YouTube video notes for:
How to Create a Floor Plan in SketchUp (2024)

These are the full notes for our video — every tip, screenshot and step, right on this page.
Download these notes as a PDF#1 Start in 2D
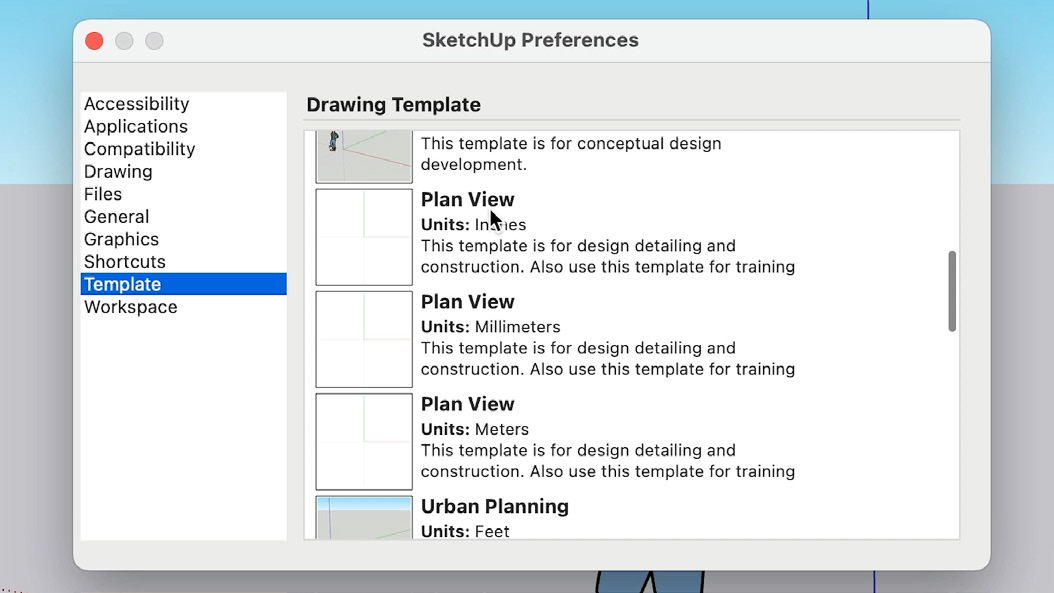
To create a 2D Floor Plan in SketchUp, you’ll want to use a Template that starts you in a Top-Down view.
Windows
- In your top menu, select Window > Preferences. On the left side, select Template.
- Depending on your version of SketchUp, select either Plan View or Construction Documentation (the thumbnail with the white background)
- Then click OK - your current file’s template won’t change. You need to start a new file to see the new template.
Mac
- In your top menu, select SketchUp > Preferences. On the left side, select Template.
- Depending on your version of SketchUp, select either Plan View or Construction Documentation (the thumbnail with the white background)
- Then close the window - your current file’s template won’t change. You need to start a new file to see the new template.
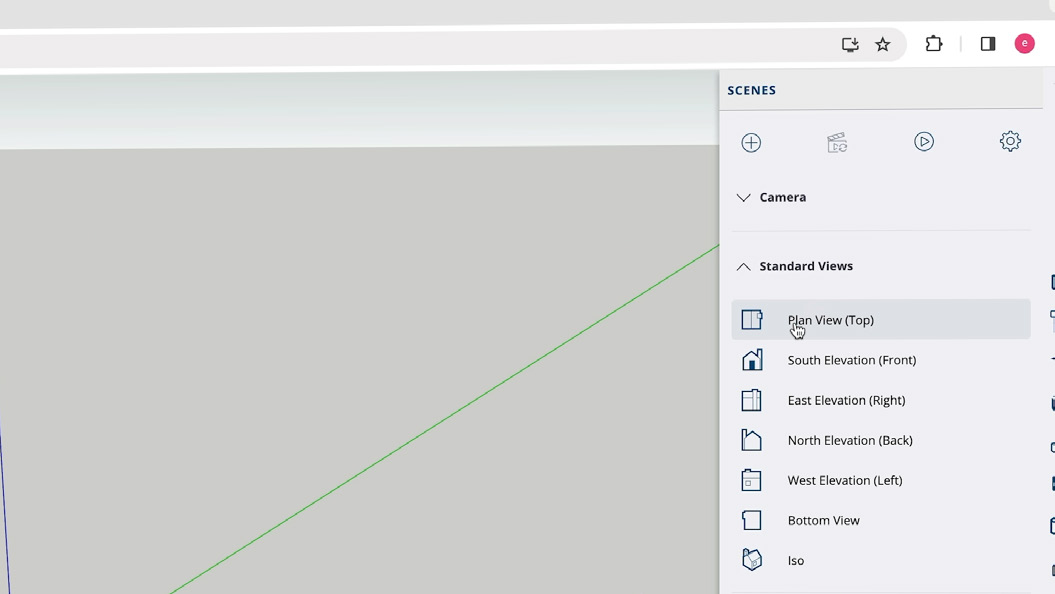
SketchUp Free: You can get a close enough view by clicking on the Scenes icon on the right, then under the Standard Views tab, picking Plan View (Top).
#2 Draw Your Floor
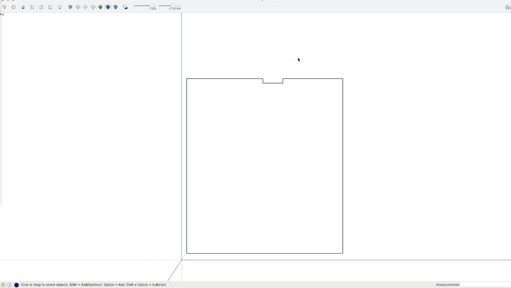
Start from either an existing file - such as a CAD or PDF file with the as-built measurements - or from scratch using measurements taken in the field.
Draw your floor outline using primarily the Line, Rectangle and Eraser tools. Enter accurate dimensions as you go via the Measurements box.
#3 Draw Your Exterior Walls
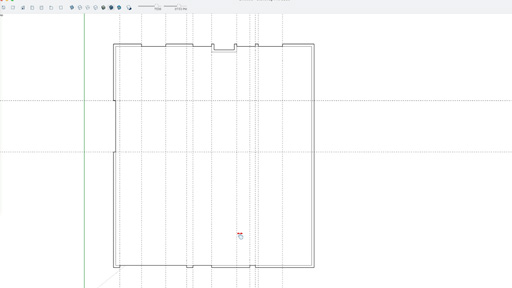
Use the Offset tool on your floor to offset exterior walls (to the outside).
Then create doorway openings: Use the Tape Measure tool to set-up guides, then the Rectangle tool to draw the shape of the opening. Then use the Eraser tool to erase away the outside edge.
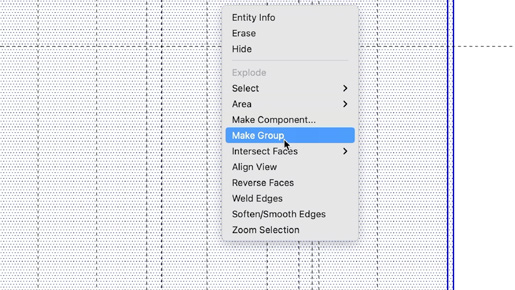
To Group your floor and walls: Select everything, right-click on the selection and pick the option for Make Group.
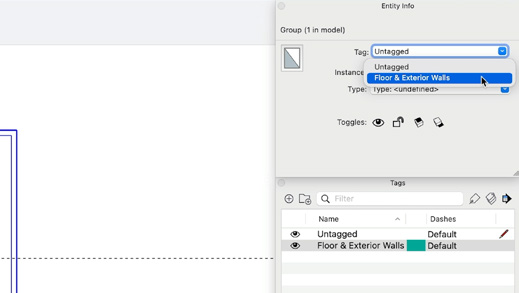
Then assign a Tag to the Group. To do that:
- Open your Tags dialog and create a new Tag
- Right-click on the Group and select the option for Entity Info
- In the Entity Info dialog, click on the Tag dropdown menu and select the Tag you just created
#4 Draw Your Interior Walls
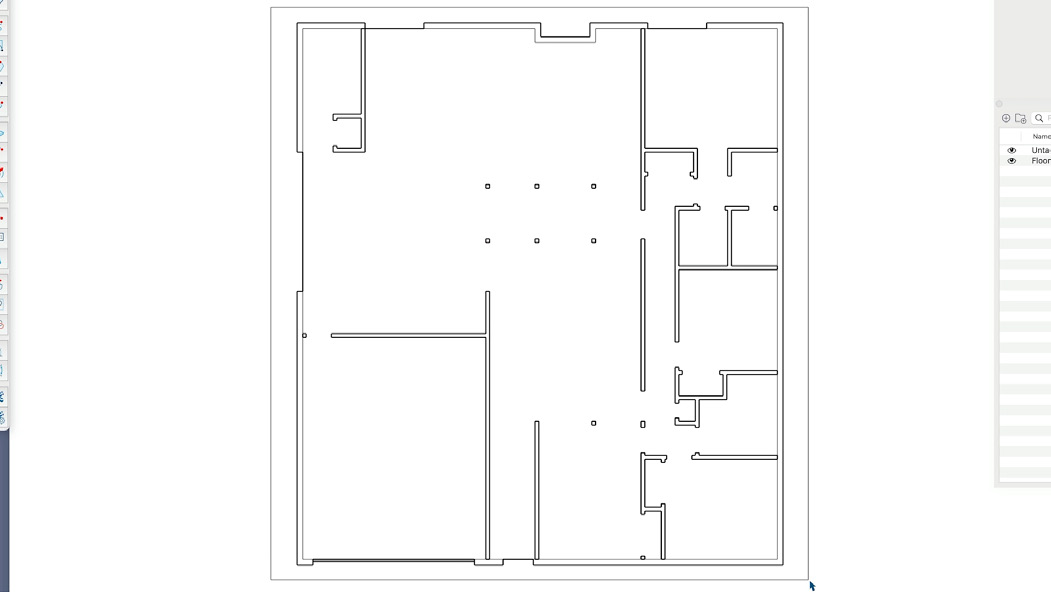
Use the Tape Measure tool to set-up as many Guides as you need. Then use the Line, Rectangle and Eraser tools to draw the outlines for your interior walls.
If the Guides get in the way, you can either erase them individually with the Eraser tool, or you can delete them all by going to your top menu and selecting Edit > Delete Guides.
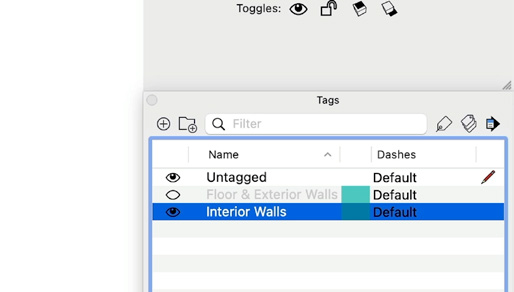
Then turn the walls into a Group, and assign a Tag to it.
#5 Add Your Windows & Doors
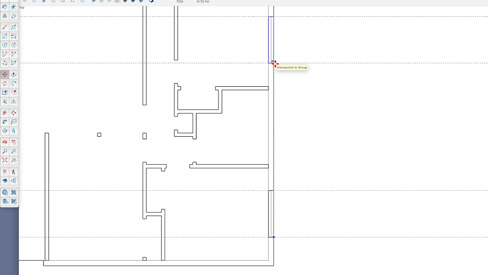
To create your own 2D symbols for things like Windows and Doors:
- Use the Drawing tools to draw the shapes for your Window or Door
- Use the Select tool to select what you’ve drawn
- Right-click on the selection, and pick the option for Make Component
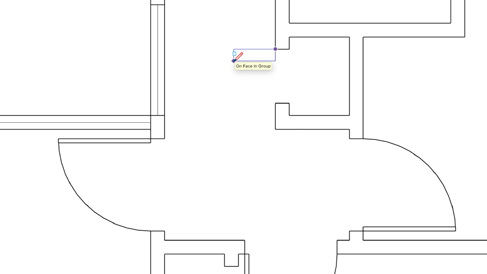
Use the Move tool to make copies of Components around the floor plan (press the Option key on a Mac or the Control key on a PC to enable the copy function while using the Move tool).
To modify a Component, right-click on it and select Edit Component. Then edit as you would any other geometry.
Note: If you have more than 1 copy of a component in your drawing, editing one of them will edit the others as well. If you need to edit one separate of another, you must first right-click on it and select Make Unique. Then follow the steps to Edit Component from there.
Use Rotate and/or the Flip tool to help place components accurately.
#6 Import Furniture & Fixtures
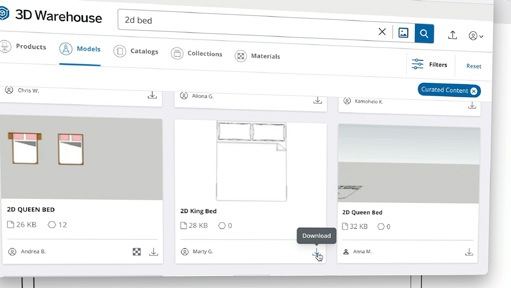
To import 2D symbols that have already been drawn, either use the 3D Warehouse or import files manually.
For the 3D Warehouse:
- In your top menu, select Window > 3D Warehouse
- Search for “2D (name of object)”, e.g. “2D king bed”
- Look for a good result and download into your drawing
BONUS: We’ve already created a starter 2D Symbol library for you and you can find it on the 3D Warehouse here.
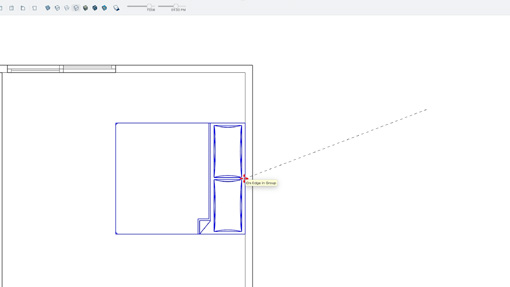
To import manually, you’ll need to:
- Start with either a SketchUp file (.skp) or a CAD file (.dwg or .dxf) with 1 or more symbols in it
- Then in SketchUp, in your top menu, select File > Import
- Be sure to set the file type to .skp or .dwg/.dxf as needed, pick the file and select Import to bring it into your drawing
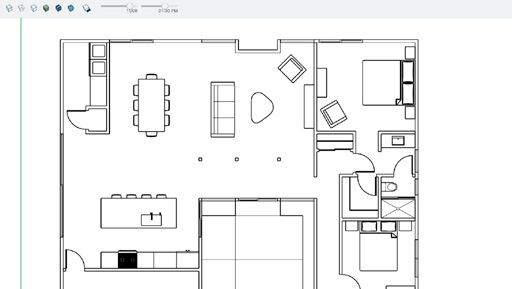
#7 Style Your Plan for Presentation
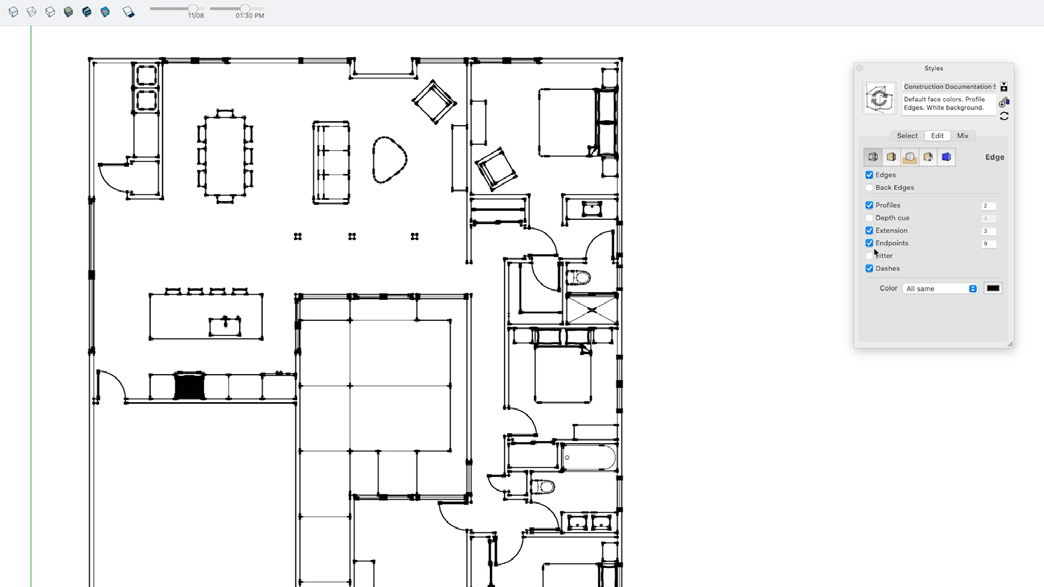
Use the Styles dialog to prepare your floor plan for presentation. For a black and white plan:
- In the Styles dialog, click the Edit tab
- Click on the Face style icon
- Click on the white Hidden Line icon
To experiment with the look of the lines, click on the Edge style icon and test out different options. To turn off the Axes, in your top menu pick the option for View > Axes.
Once you have the look you want, export an image or PDF by going to your top menu and selecting File > Export > 2D Graphic.
If you pick an image format like PNG or JPG, you’ll get a raster image which may make some lines appear less crisp. Pick PDF for a vector file that will make the lines sharp.
YOUR NEXT STEPS
We hope our How to Create a Floor Plan in SketchUp video and these notes have gotten you started down the right path.
From here, it’s definitely possible to learn everything on your own. But if you don’t have the time to figure out what you need to know, and you can’t afford to pick up bad habits, we recommend checking out our Video Course Library.
It’s filled with $8700 worth of SketchUp training exclusively for professionals — including our Complete Intro to SketchUp course.