YouTube video notes for:
7 Tips for Interior Renderings with V-Ray for SketchUp
These are the full notes for our video — every tip, screenshot and step, right on this page.
Download these notes as a PDF#1 Start with Draft Settings
You’ll need to render frequently to see the effect of different settings, so you should choose draft settings that will render quickly:
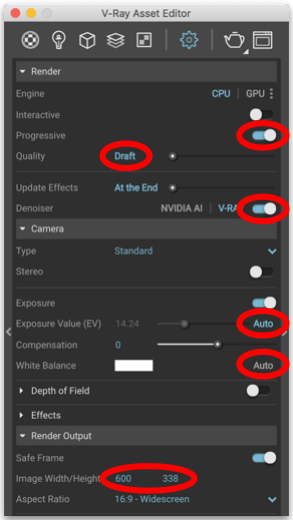
- Set your Image Width/Height as low as you can while still being able to preview how your rendering will look.
- Choose Progressive rendering mode
- Set your render Quality to Draft
You might also want to turn on Denoiser to see smoother results.
And consider enabling Auto Exposure and Auto White Balance.
#2 Use Material Override
Your first priority is to get your lighting right. It’s easier to do that without seeing your materials. Here are some tips for using V-Ray’s Material Override feature:
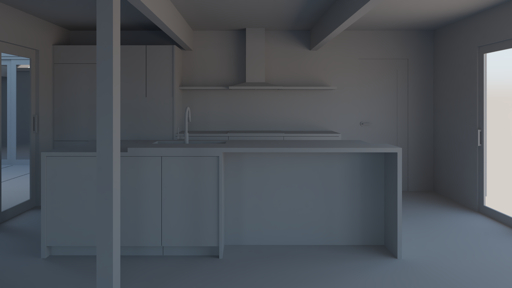
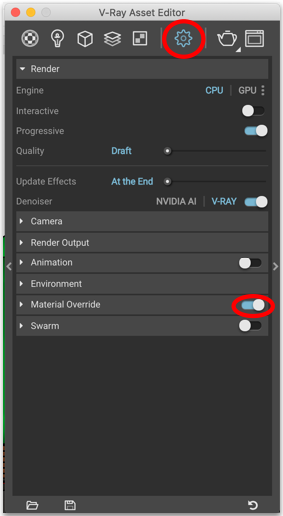
- In the V-Ray Asset Editor, toggle-on Material Override
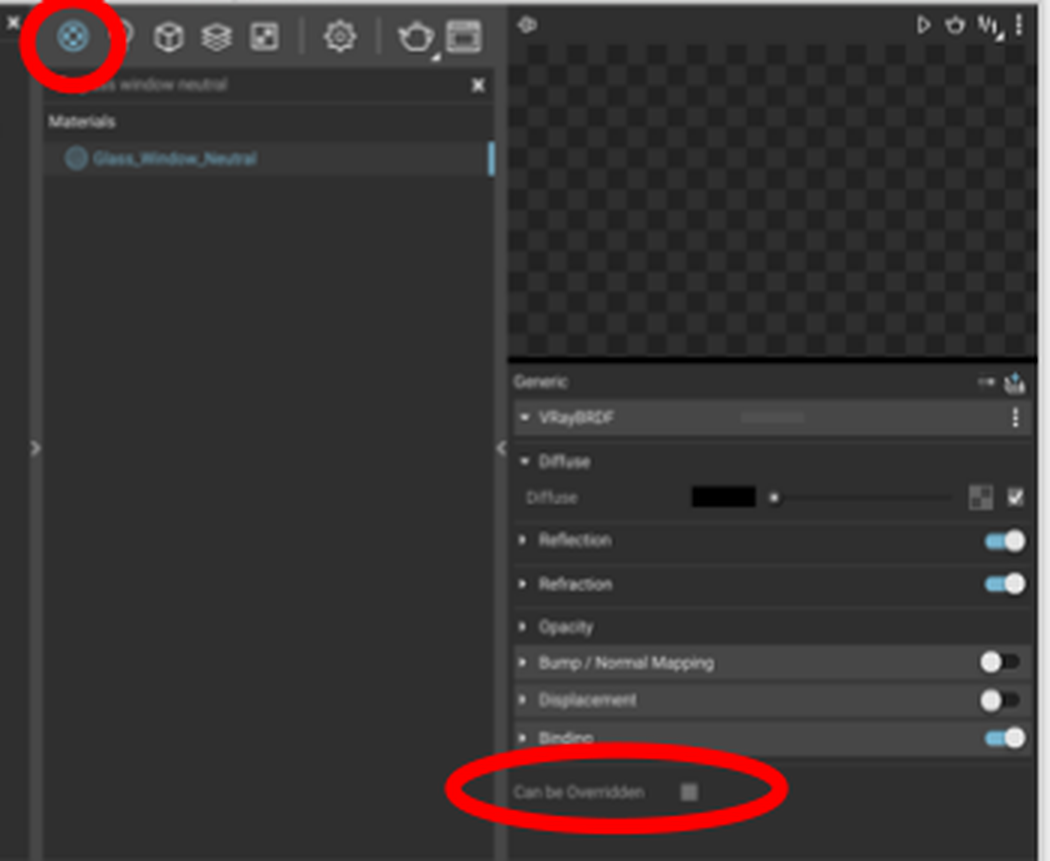
- Be sure to use a pre-configured V-Ray Glass material for any windows
- In your Glass material’s settings, uncheck Can Be Overridden so that the light can pass through the glass and properly light the interior.
#3 Figure Out Your Key Lighting
For a daytime, interior rendering, you’ll often use either the V-Ray Sun or a V-Ray Dome Light as your key light. Here are some tips to help you choose the best option:
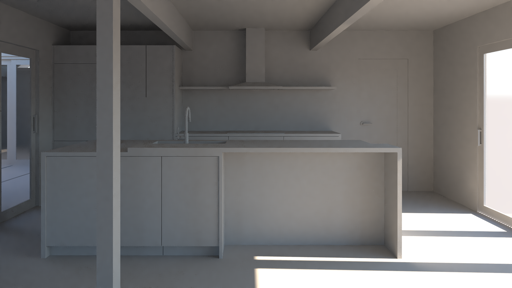
V-Ray Sun — You should use the V-Ray Sun when:
- You need to light your model quickly. Because it’s the default light, you have sunlight out of the box without having to set anything up.
- You need accurate shadows. The V-Ray sun’s position is determined by your Shadow settings in SketchUp (which rely on your Geolocation settings).
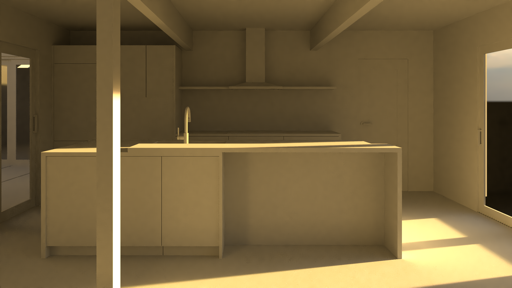
V-Ray Dome Light — You should use a Dome Light when:
- You want higher quality, more realistic lighting. Because Dome Lights rely on high definition images of real skies, they cast all of the color and varied light we see in the real world.
- You don’t mind investing a little more time (and perhaps money) to find and set-up a custom HDR image.
#4 Add Fill Lights
After you set-up your Key lighting, you can use Fill Lights to adjust the lighting for darker areas of your interior. Here are some things to keep in mind:
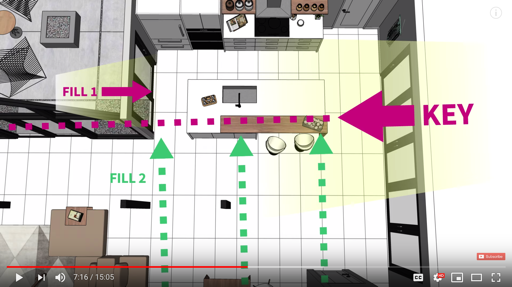
- Use V-Ray Rectangle Lights to cast wider, softer light — especially to simulate light entering the space from off-camera.
- When possible, try adding a Fill Light at 90 degrees relative to your Key Light — and preferentially on the opposite side of the camera as your Fill Light.
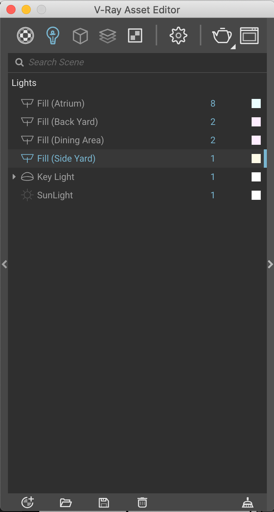
- Adjust the strength and color of each Fill Light in isolation, then balance them all against the Key Light.
And don’t forget to name your lights as you add them. Your future self will thank you! ;)
#5 Use Realistic Materials
Once your lighting is set-up, it’s time to adjust your materials. Here are some tips for more realistic looking materials:
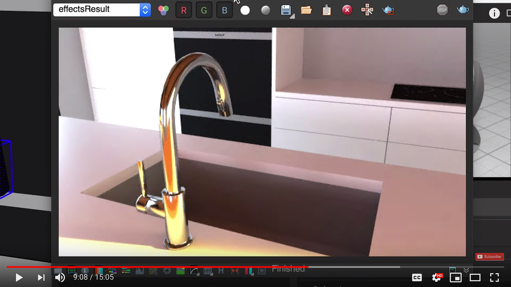
- Replace basic SketchUp materials with preconfigured V-Ray materials (which will render nicely out-of-the-box)
- When you need to keep the specific material you already have, you can manually adjust its Reflection and Refraction settings. Search online for the Reflection and Refraction settings for common materials (e.g., Steel or Wood).
- Use the Bump/Normal Mapping feature to give your material the appearance of more texture.
And don’t forget to name your Materials as you add them to make it easier to find and adjust them later.
#6 Mind Your Background
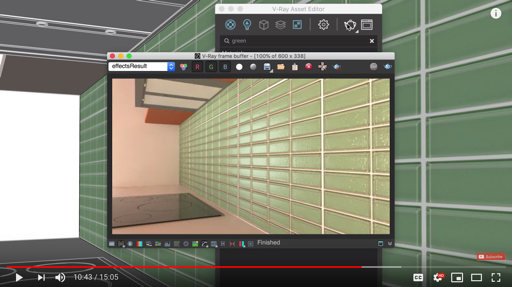
When you have a window with a view to the outside, here are some tips for handling what you see in the background:
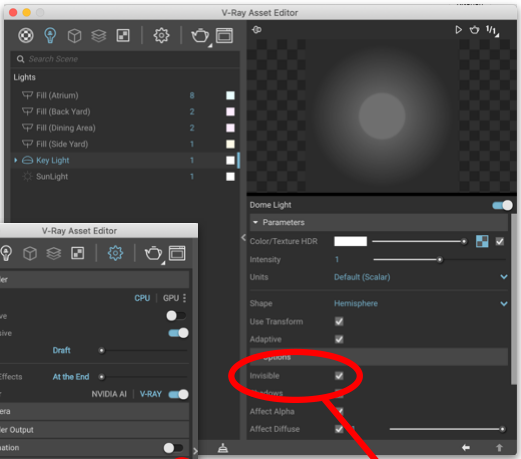
- Model the background in SketchUp. When there’s not much to see, this is the easiest option as you can spend a little time in SketchUp and skip having to use Photoshop later.
- Add the background in Photoshop. If you know Photoshop well, this may be the best option. But if your Photoshop skills are weaker, there’s a risk that it will look unnatural.
- Or, part SketchUp, part Photoshop.
If you plan to add anything in Photoshop later, be sure to:
- Set your Dome Light to be Invisible
- Uncheck your Background
- For your window’s glass material, in the Advanced Settings, under the Refraction menu, set the Affect Channels to Color + Alpha
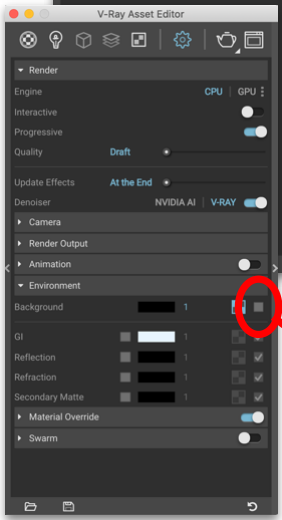
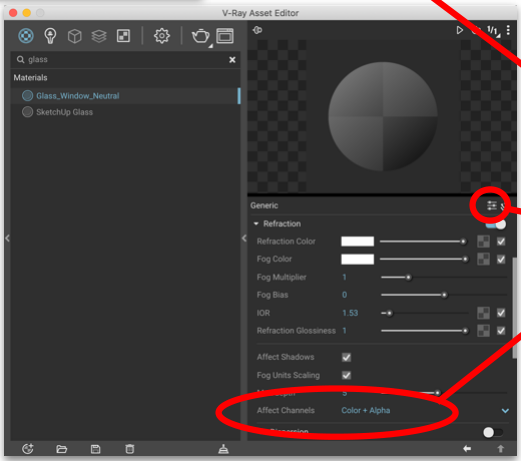
And save your rendering as a PNG so you have a transparent background.
#7 Final Render Settings & Adjustments
Ready to create your final rendering? Here are some tips to get the best results:
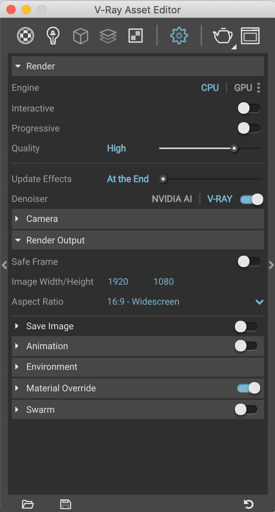
- Switch off Interactive and Progressive to enable Bucket rendering mode.
- Set the Quality to High (Very High is usually overkill).
- Toggle Denoiser on
- Set your Image Width/Height to the full resolution you need for your final image.
Then click the Render button.
Once your rendering is finished, you can make image corrections in the V-Ray Frame Buffer. One especially important correction to make involves the Exposure:
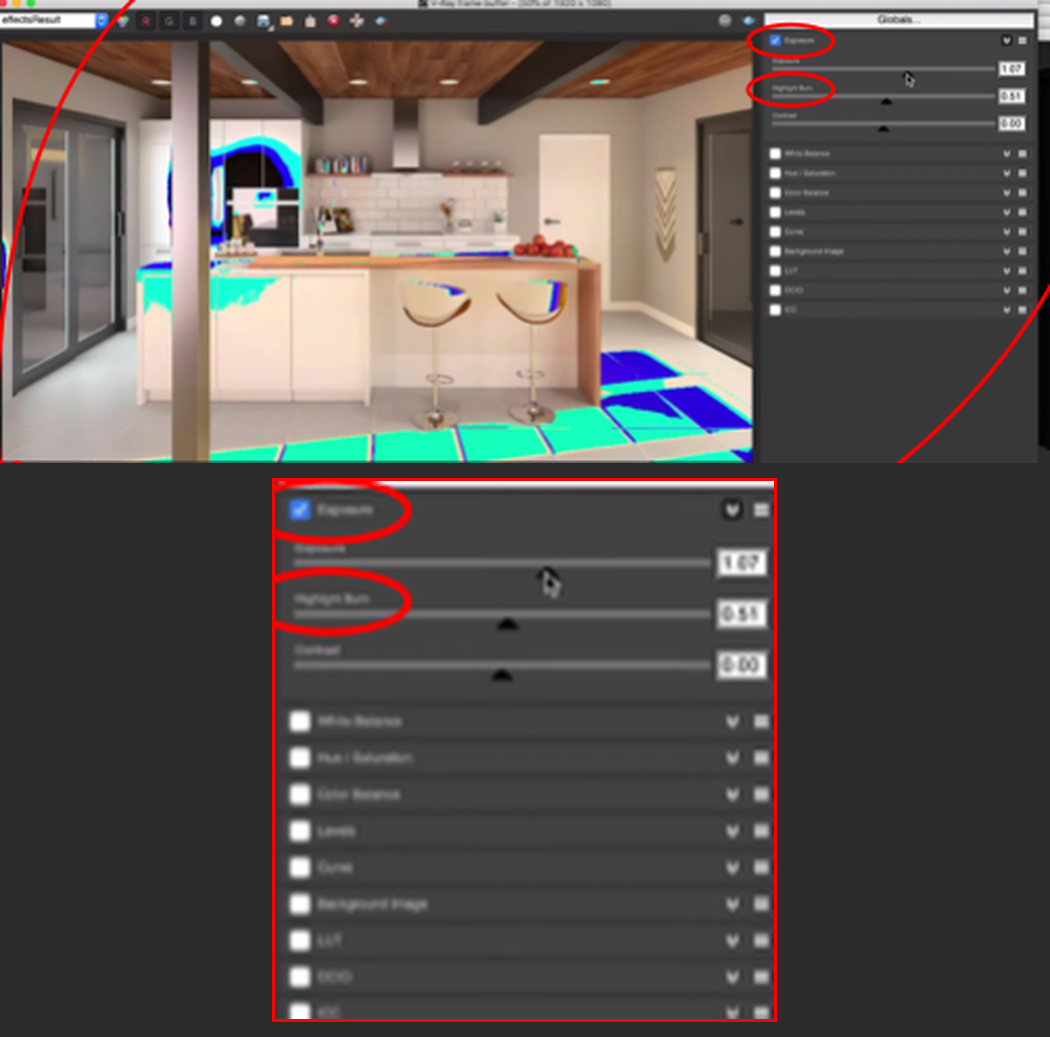
- Open your Corrections Control panel
- Click to enable Force Color Clamping. If strange colors appear on your rendering, it means those parts of the image are over-exposed.
- Check the Exposure box, click down arrow to the right to show the controls, and adjust the Highlight Burn slider left until the strange colors go away.
BONUS Interior Rendering Resources
HDR Images (for Dome Lights)
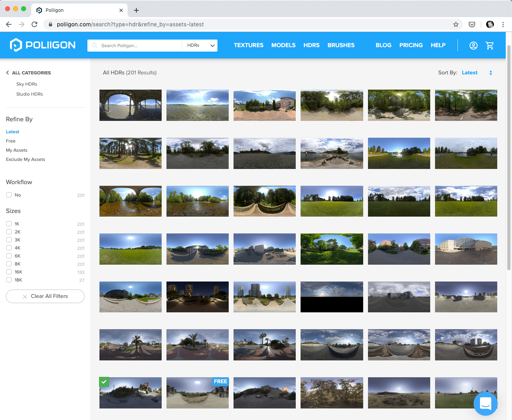
Poliigon is a great place to find HDR images to light your model. While most images can be purchased, there are a few free images you can use to try Poliigon out. And if you can’t find the right HDR at Poliigon, take a look at PG Skies.
Realistic Materials
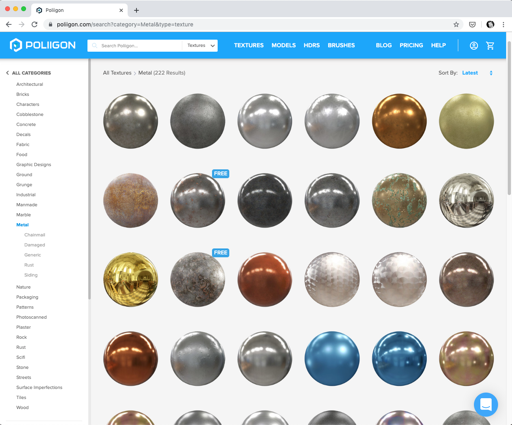
Poliigon is also a great place to find realistic materials, along with all the files you need to automatically configure Reflection, Refraction, Bump/Normal Mapping and more. Most materials need to be purchased, but again there are free ones you can try out first.
Another option: Chaos, the makers of V-Ray, offer VR Scans, a library of over 1000 photoreal materials. It’s a paid library, but there is a free trial.
YOUR NEXT STEPS
We hope our 7 Tips for Interior Renderings with V-Ray for SketchUp video and these notes have gotten you started down the right path.
From here, it’s definitely possible to learn everything on your own. But if you don’t have the time to figure out what you need to know, and you can’t afford to pick up bad habits, we recommend checking out our Video Course Library.
It’s filled with $8700 worth of SketchUp training exclusively for professionals — including our V-Ray for SketchUp courses.