YouTube video notes for:
From SketchUp to Photoshop — 7 Quick Tips for Success
These are the full notes for our video — every tip, screenshot and step, right on this page.
Download these notes as a PDF#1 Split your SketchUp image into Photoshop Layers
In order to get the best results in Photoshop, you’ll need to isolate elements of your SketchUp model onto their own separate Photoshop layers. That way, you can edit each piece separately without affecting the rest of the rendering. To do that:
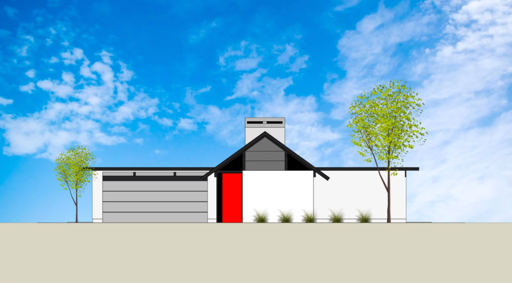
- In SketchUp, create a different Scene for each element you plan to isolate in Photoshop (e.g., Shadows) - make sure each Scene has the same camera angle
- Export each Scene as its own image
- Bring each exported image into Photoshop on its own Layer and use Blending Modes to put the SketchUp image back together
#2 Export Transparency and Alpha Masks
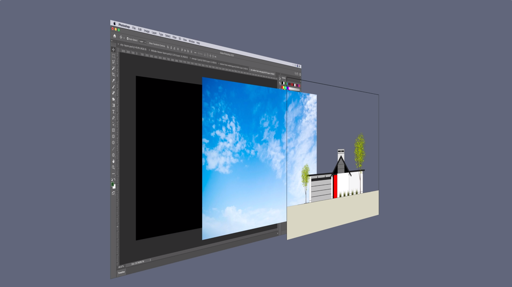
When you need to export an image of your model with a transparent background there are a few things to keep in mind:
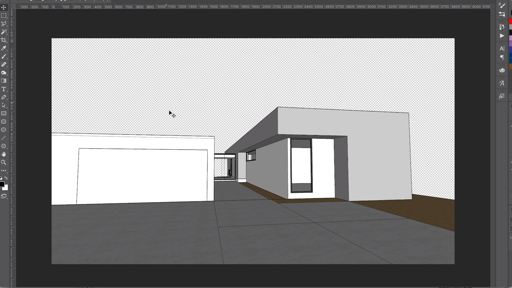
First, you need to turn off the Sky and Ground colors in the background. You also need to set your background color to white.
Then, when you Export, be sure to select PNG and in the Options pick Transparent Background.
If you’re familiar with Alpha Masks, you can set-up a Scene in SketchUp that will help you later in Photoshop. Follow these steps in SketchUp:
First, set your background to Black. Then set your Faces to Monochrome and set both front and back Faces to White. Make sure the edges are turned off, along with any other visible elements.
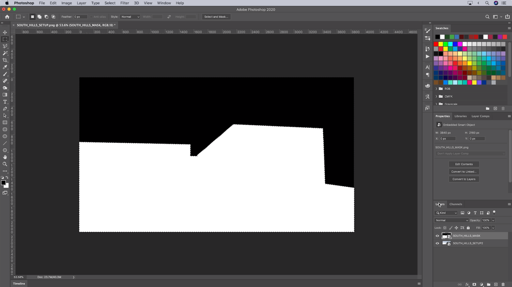
Export this Scene as a PNG - no need for a transparent background - and then use it in Photoshop to quickly set-up a Layer Mask when you need it.
#3 Create Selection Helper Scenes
In Photoshop, you often need to select individual elements within an image so that you can make adjustments to only those areas. The good news is that there are two types of scenes you can create in SketchUp that will help you make easier selections in Photoshop.
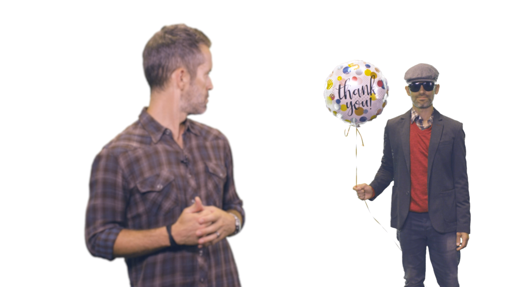
1) Flat Color scene: Set your Faces to Shaded and turn off your Edges. Turn the Shadows off, but make sure to check the Use Sun for Shading option and slide the Light slider to 0 and the Dark slider to 100. Later in Photoshop, you can use the Select > Color Range feature to select one of the flat colors, then you can use that selection to confine the adjustments you make on another Photoshop layer.
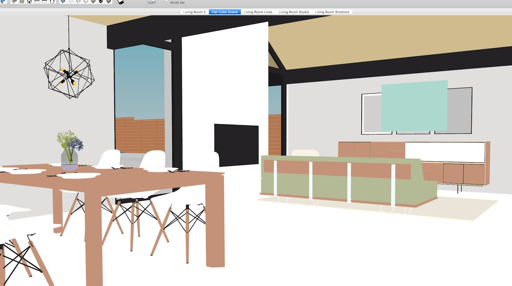
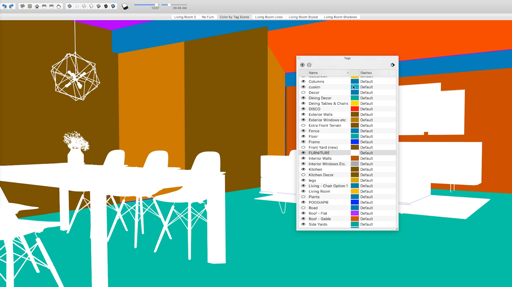
2) Color by Tags scene: In this case, you need to think ahead about what types of SketchUp Tags to create. Then in the Tags dialog select Color By Tag. You can edit the Tag colors to whatever you like. Then export and use the same way as the Flat Color scene, only now you can isolate your selections in a different way.
#4 Use SketchUp’s Horizon
When it comes time to blend the perspective of your SketchUp model with a background or other imagery in Photoshop, you can save a Horizon scene to help.
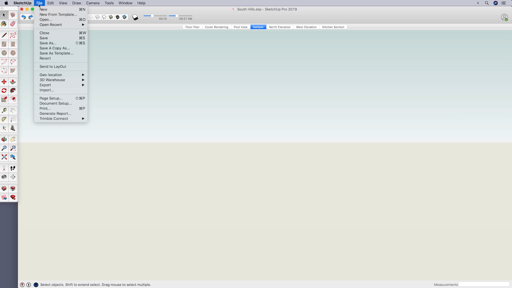
To do that, in SketchUp, you just need to hide your model and turn on the Sky and Ground. Save a Scene and export it.
In Photoshop, you can import the horizon image onto a new layer. Then drag a Photoshop guide down to match the horizon, and hide the SketchUp horizon layer.
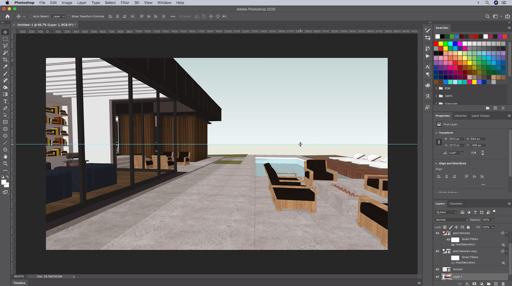
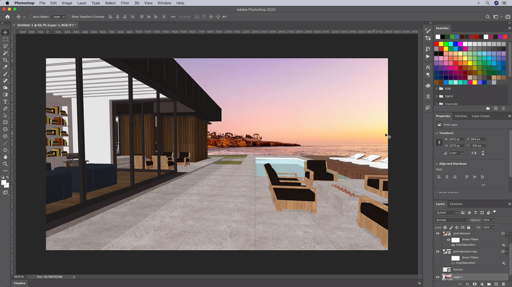
And now you can use that guide to help you figure out all sorts of things, like where your background image’s horizon should be or how to set up your vanishing points using Photoshop’s perspective tools. It’s a great trick for helping you line things up.
#5 Isolate SketchUp Tags for Reference
Sometimes, it’s best to add things in Photoshop later. In some cases, you can find a better looking person or thing as a Photoshop cutout. In other cases, adding something in 3D in SketchUp could make your model too complex.
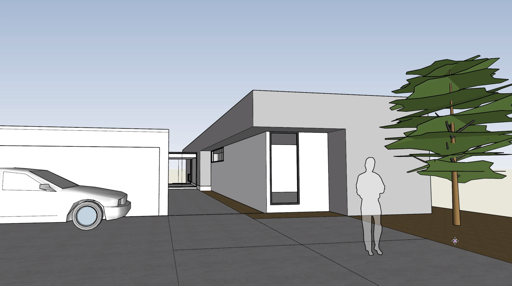
If you plan to add stuff later in Photoshop, here’s a strategy to consider in SketchUp:
Add representations of those people or things in SketchUp. They don’t have to look exactly like they will in Photoshop, but they should be placed in the right spot and properly scaled.
Then assign those people or things their own SketchUp Tags.
In your Tags dialog turn off the visibility for all of the tags, leaving only the tag for the reference people or things visible. Then Save a Scene and export that scene with a transparent background.
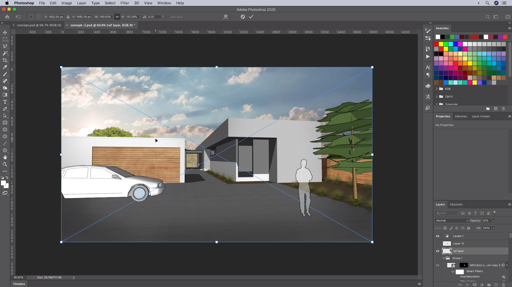
In Photoshop, you can treat this Scene as a reference layer — using the placement and scale of the objects to guide you as you add your own versions in Photoshop. And then, of course, you can hide the reference layer when you’re done.
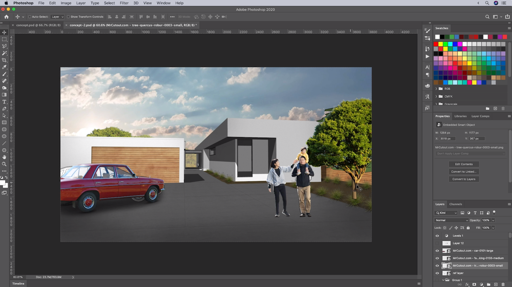
#6 Turn SketchUp Fog into a Depth of Field Effect
In SketchUp: Edit your Style settings so that your Faces are set to display Hidden Line and your Edges are turned off.
Then turn on your Fog and make sure Use Background Color is unchecked, and click the color icon and set the color to Black.
Next, move the sliders until your foreground elements are pure white, your background is pure black and there are shades of gray falling across the model. Then save a Scene and Export it.
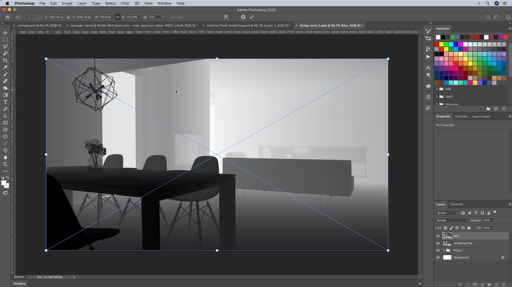
In Photoshop: In your top menu, select the option for File > Place Embedded and select the image you exported from SketchUp. Press the Return key to place it.
Click the eye icon next to hide the layer you just placed. Then select the layer you would like to apply the effect to. Finally, click and drag the hidden fog layer onto the icon to create a Layer Mask.
Click on the thumbnail for the image (not the mask) to focus on it. Then in your top menu, select Filter > Blur > Lens Blur.
In the upper right corner, under Depth Mask Source, select Layer Mask. Adjust the controls and click OK.
Voila! Depth of Field!
#7 Streamline your SketchUp to Photoshop Workflow
There are a couple of ways you can streamline your SketchUp to Photoshop workflow.
[Cheatsheet] SketchUp Scenes for Photoshop
What follows is a list of each of the type of Scenes you can create in SketchUp, including all of the settings, that you can then use as a separate Layer in Photoshop.
Textures only
- Styles > Edge Settings: All boxes unchecked (no edges visible)
- Styles > Face Settings: Pick Shaded with Textures (striped box icon)
- Styles > Background Settings: Uncheck Sky and Ground, set background to white
- Shadows > Off
- Shadows > Use Sun for Shading checked On. Light = 0, Dark = 80
Edges only
- Styles > Edge Settings: Edges checked On, Profiles checked On and set to 1. (Note that you can have different scenes for Edges vs. Profiles, or set your Profiles to a larger value… experiment).
- Styles > Face Settings: Pick Hidden Line (white box icon)
- Styles > Background Settings: Uncheck Sky and Ground, set background to white
- Shadows > Off
- Shadows > Use Sun for Shading checked On. Light = 0, Dark = 80
Shadows only
- Styles > Edge Settings: All boxes unchecked (no edges visible)
- Styles > Face Settings: Pick Hidden Line (white box icon)
- Styles > Background Settings: Uncheck Sky and Ground, set background to white
- Shadows > On
- Shadows > Use Sun for Shading checked On. Light = 100, Dark = 0
Shading only (“Clay Render”)
- Styles > Edge Settings: All boxes unchecked (no edges visible)
- Styles > Face Settings: Pick Hidden Line (white box icon)
- Styles > Background Settings: Uncheck Sky and Ground, set background to white
- Shadows > Off
- Shadows > Use Sun for Shading checked On. Light = 50, Dark = 15
Flat Color
- Styles > Edge Settings: All boxes unchecked (no edges visible)
- Styles > Face Settings: Pick Shaded (plain tan box icon)
- Styles > Background Settings: Uncheck Sky and Ground, set background to white
- Shadows > Off
- Shadows > Use Sun for Shading checked On. Light = 0, Dark = 80
Color by Tag
- Tags > Details icon > select Color by Tag. Click color swatch next to Tag to edit color
- Styles > Edge Settings: All boxes unchecked (no edges visible)
- Styles > Face Settings: Pick Shaded (plain tan box icon)
- Styles > Background Settings: Uncheck Sky and Ground, set background to white
- Shadows > Off
- Shadows > Use Sun for Shading checked On. Light = 0, Dark = 80
Horizon only
- Tags > Assign everything in your model to one or more Tags and hide them all
- Styles > Edge Settings: Won’t matter - everything is hidden
- Styles > Face Settings: Won’t matter - everything is hidden
- Styles > Background Settings: Turn on Sky and Ground
- Shadows > Won’t matter - everything is hidden
Reference Tags
- Tags > Assign everything in your model to one or more Tags. Turn visibility On for the Tag you want to isolate (and reference). Turn off visibility for rest of Tags.
- Styles > Edge Settings: All boxes unchecked (no edges visible)
- Styles > Face Settings: Pick Shaded with Textures (striped box icon)
- Styles > Background Settings: Uncheck Sky and Ground, set background to white
- Shadows > Off
- Shadows > Use Sun for Shading checked On. Light = 0, Dark = 80
Alpha
- Styles > Edge Settings: All boxes unchecked (no edges visible)
- Styles > Face Settings: Pick Monochrome (half tan/half blue box icon). Set Front and Back Faces to White.
- Styles > Background Settings: Uncheck Sky and Ground, set background to black
- Shadows > Off
- Shadows > Use Sun for Shading checked On. Light = 0, Dark = 80
Depth
- Fog > On and check-on Use Background Color. Slide sliders: Foreground white, background black, inbetween shades of gray
- Styles > Edge Settings: All boxes unchecked (no edges visible)
- Styles > Face Settings: Pick Monochrome (half tan/half blue box icon). Set Front and Back Faces to White.
- Styles > Background Settings: Uncheck Sky and Ground, set background to black
- Shadows > Off
- Shadows > Use Sun for Shading checked On. Light = 0, Dark = 80
[Extension] Automate Scenes with CompoScene
For many of the Scenes just listed, you can automate their creation - as well as automate exporting each one out of SketchUp to be used later in Photoshop - by using the CompoScene extension.
YOUR NEXT STEPS
We hope our From SketchUp to Photoshop: 7 Quick Tips for Success video and these notes have gotten you started down the right path.
From here, it’s definitely possible to learn everything on your own. But if you don’t have the time to figure out what you need to know, and you can’t afford to pick up bad habits, we recommend checking out our Video Course Library.
It’s filled with $8700 worth of SketchUp training exclusively for professionals — including our Rendering SketchUp Models in Photoshop courses.