YouTube video notes for:
How to Measure & Model a Room in SketchUp
These are the full notes for our video — every tip, screenshot and step, right on this page.
Download these notes as a PDF#1 Orient your Model to the Space

By default, the Green Axis in SketchUp runs in the North/South direction and the Red Axis runs East/West
Begin by launching SketchUp and choosing a Plan View template which allows you to start in a Top Down or “2D” like view.
Before you measure or draw anything, be sure to figure out which way is North. If you make sure to orient your model in the correct direction — you’ll be able to take advantage of SketchUp’s built-in shadows feature, which will show how light and shadows move across the space at different hours of the day or times of the year.
Once you know which direction is North, in SketchUp, know that the Green Axis runs North/South, and the Red Axis runs East/West. With that information in mind, you’re ready for the next step.
#2 Draw the Width & Length
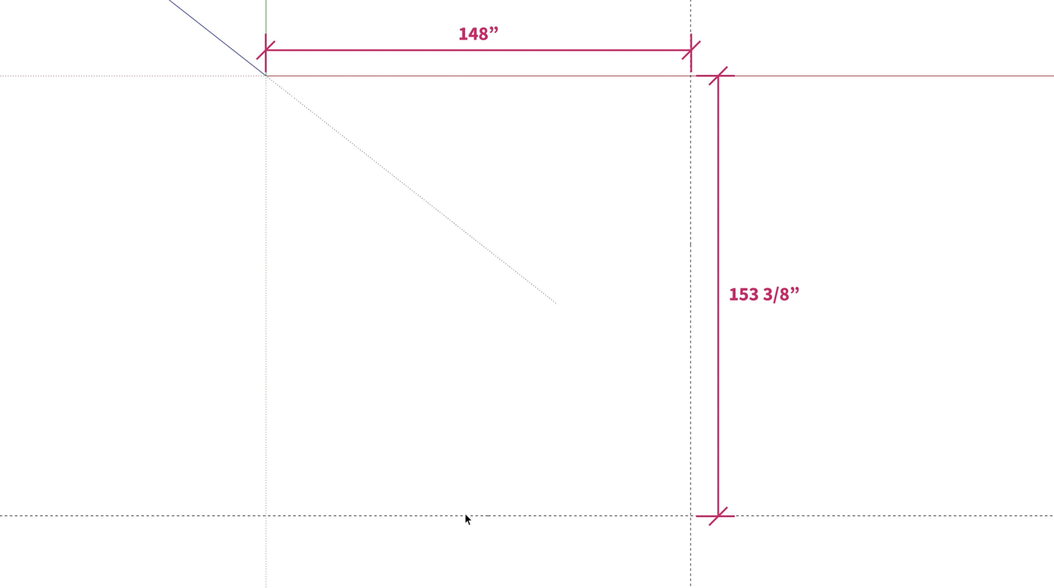
Before drawing the footprint of your space, it’s helpful to first use the Tape Measure tool to add Guides
Now it’s time to measure your space, and the first thing you’ll want to determine is the overall width and length of the room. Once you know those dimensions, you might be tempted to draw a rectangle with those dimensions in SketchUp. However, before you do that, it will be more helpful later if you create Guides for the width and length of the space first.
To do that, with the Tape Measure tool, click on the Green axis to start pulling a new guide away from the axis. Then type the measurement for the width and press Enter or Return on the keyboard to create the guideline for the width. And then repeat the steps, only this time, click on the Red axis and follow the same steps to create a new guideline that matches the measurement for the length. Now that you have Guides for the shape of the room, you’re ready to use the Rectangle tool to draw-in the footprint.
#3 Draw the Wall Thickness
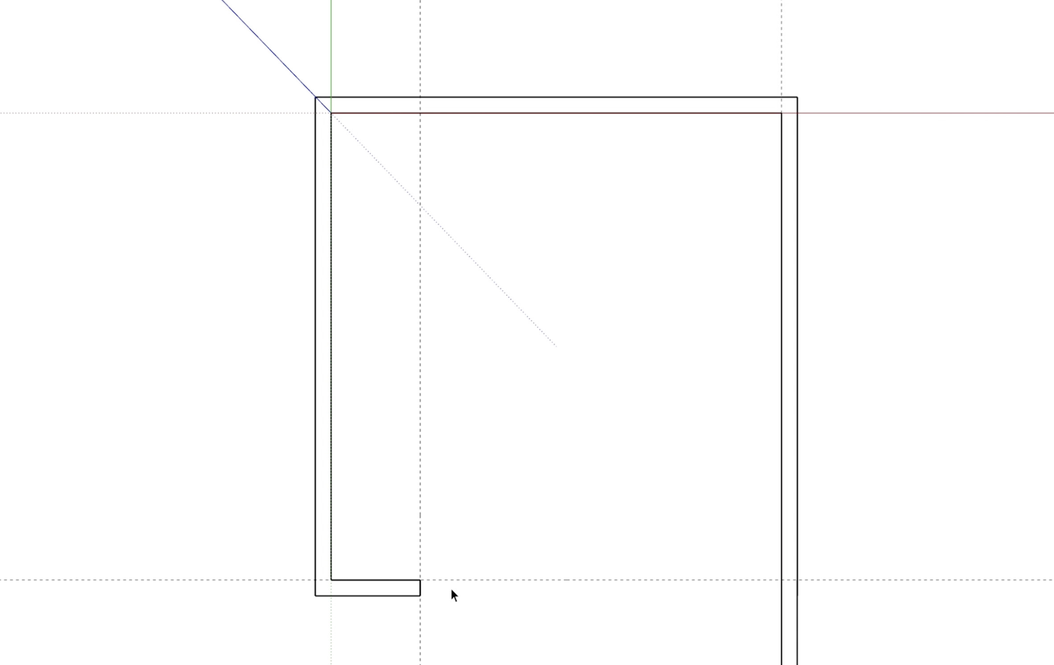
Use the Offset tool to draw the wall thickness around the footprint, and create Guides for interior walls
Next, it’s time to measure the thickness of the walls around the exterior of the footprint. Then to translate that to SketchUp, pick the Offset tool and click once on the face of the footprint you drew, then move the mouse outside of the existing edges and type the dimension for the thickness and press Enter or Return.
Then for any other interior walls or other openings in the walls, you should follow the steps to create Guides with the Tape Measure tool for all the places where you need walls, and then use the Line tool or Rectangle tool to draw the outlines for those walls. Until now, you’ve ignored any wall openings for windows or doors. If you’re creating a 2D plan, you’d add those at this point. But, when creating a 3D model, you’ll ignore the openings for now and move on to the next step.
#4 Draw the Wall Height
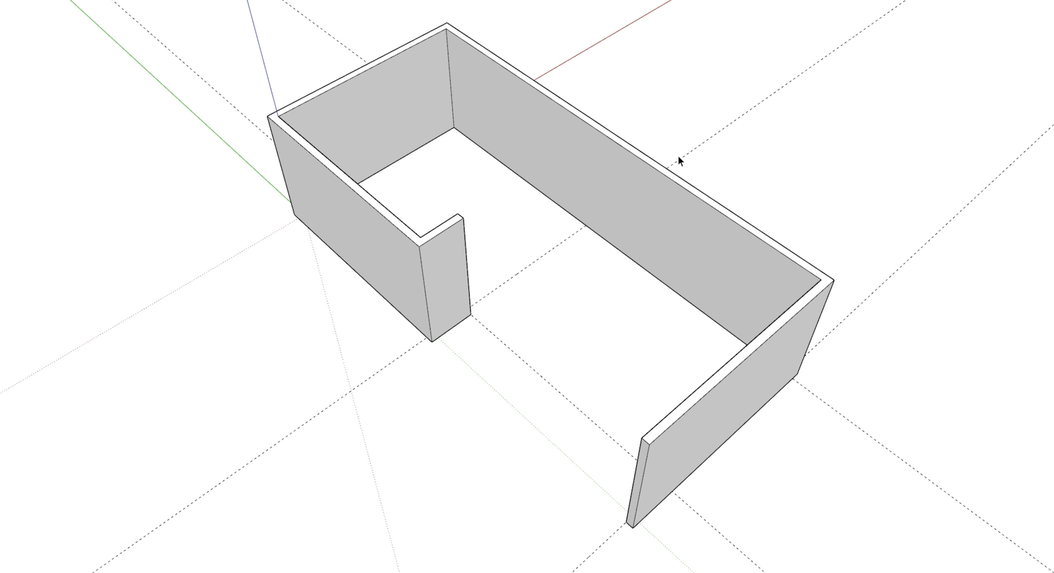
Use the Push Pull tool to extrude the 3D walls to their proper height - ignoring door and window openings for now
With your basic walls drawn in 2D, the next step is to measure the height of the ceiling.
Then once you’ve done that, head back over to SketchUp and Orbit to a birds eye view. Next, using the Push-Pull tool, hover over the face of the walls and then Click and let go to start pulling the walls up, then type in the dimension for the height of the ceiling and press Enter or Return on the keyboard to set the walls at the exact height you measured. Now you’ll have the start of your 3-dimensional room model and you’re ready to move to the next step.
#5 Create Window & Door Openings
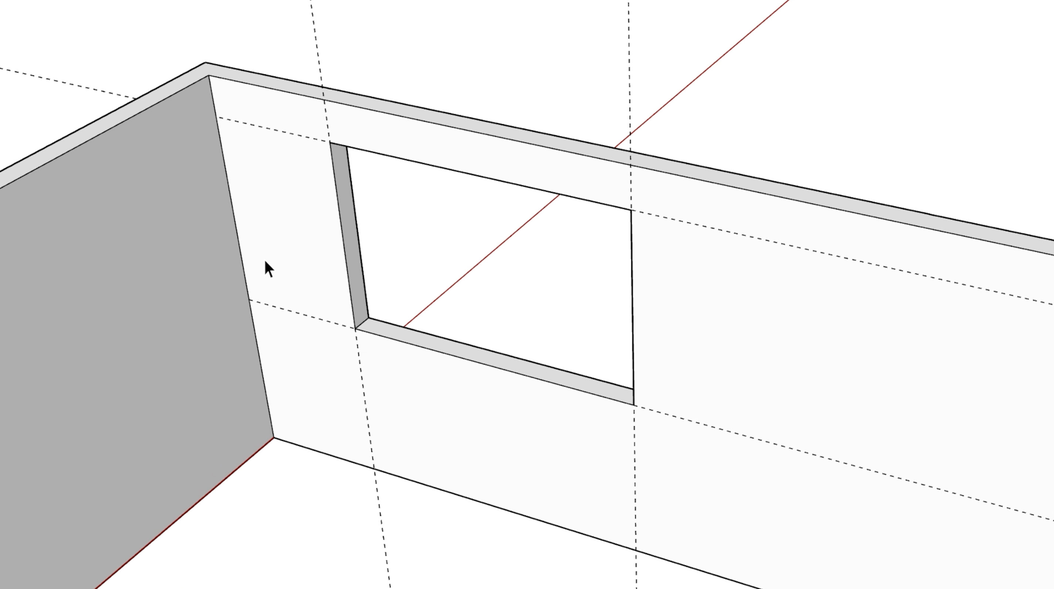
Use the Tape Measure tool to create Guides for the placement of the Door & Window openings
Now it’s time to measure the height and width for the door and window openings, as well as take measurements for their locations within the larger space.
Once you have those measurements, back in SketchUp, follow the same steps you used to create guidelines for the floors and walls, only this time you’ll create guidelines for the dimensions of the window and door openings. Then once you have your guides, you can use the Rectangle tool to trace a rectangle on the wall, and then take the Push Pull tool and push the face into the wall until it touches the other side which will delete itself and punch out an opening.
#6 Stay Organized with Groups & Tags
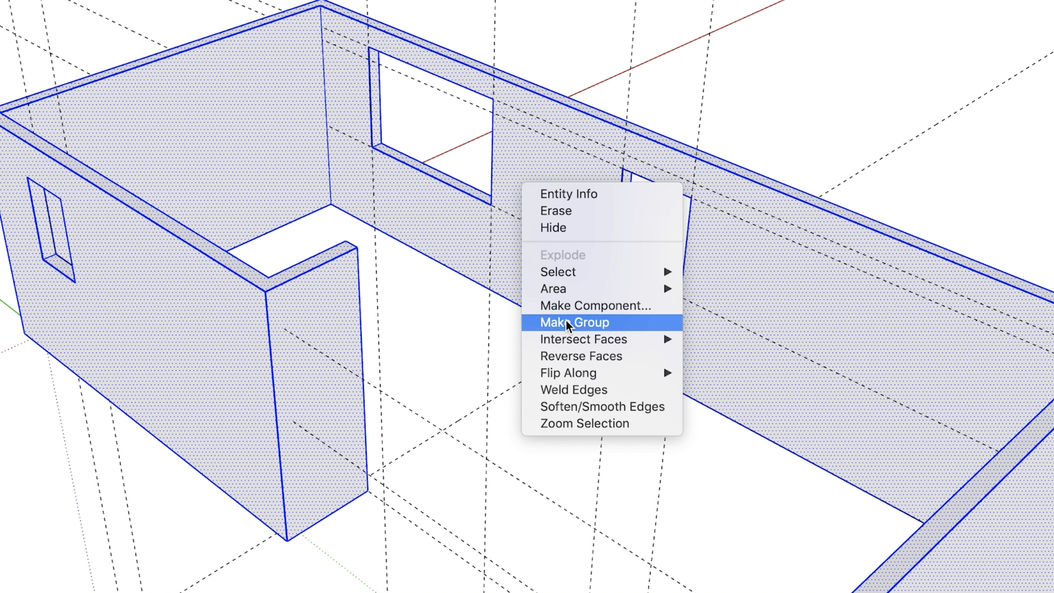
Everytime you model something distinct - like Walls - make it a Group and assign it a Tag
At this point, anything new that you draw touching the walls will get stuck to them. This will create huge headaches down the road when you realize your model’s become a sticky, uneditable mess!
But you can avoid all that pain by Grouping geometry, which protects it from getting stuck to other geometry outside the group. To create a group, use the Select tool and triple click on the walls to select them all. Then right click on the selected walls and pick the option for Make Group. And while you’re at it, assign a Tag to the Walls Group. Tags control the visibility of things in your model, which is helpful down the road if you need to hide and show different things for different views of your project.
#7 Draw the Floor
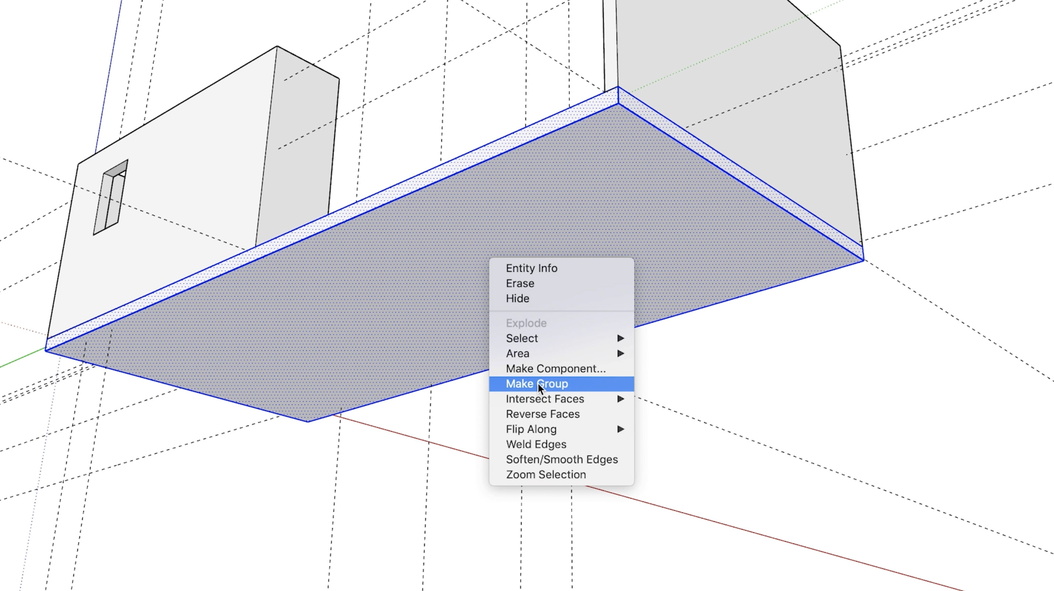
Once your Walls have been made into a Group, you can draw the Floor (be sure to Group it too)
Now that the walls have been made into a Group, you can create the floor. To do that, Orbit to the underside of the walls, then take the Rectangle tool and click from the outside corner of one of the walls, diagonally across to the outside corner at the opposite end of the walls.
With the Push-Pull tool, you can click on the face of the floor and pull the floor down to give it some thickness. If you know the thickness of the floor, you can type in the dimension here - or if you don’t need the floor thickness to be precise, just pick something like 6” - and press the Enter or Return key to create the floor. And finally, be sure to protect the floor from any unwanted stickiness by making it a Group. And again, create a Tag for the floor and assign it to the Floor Group.
#8 Draw the Ceiling

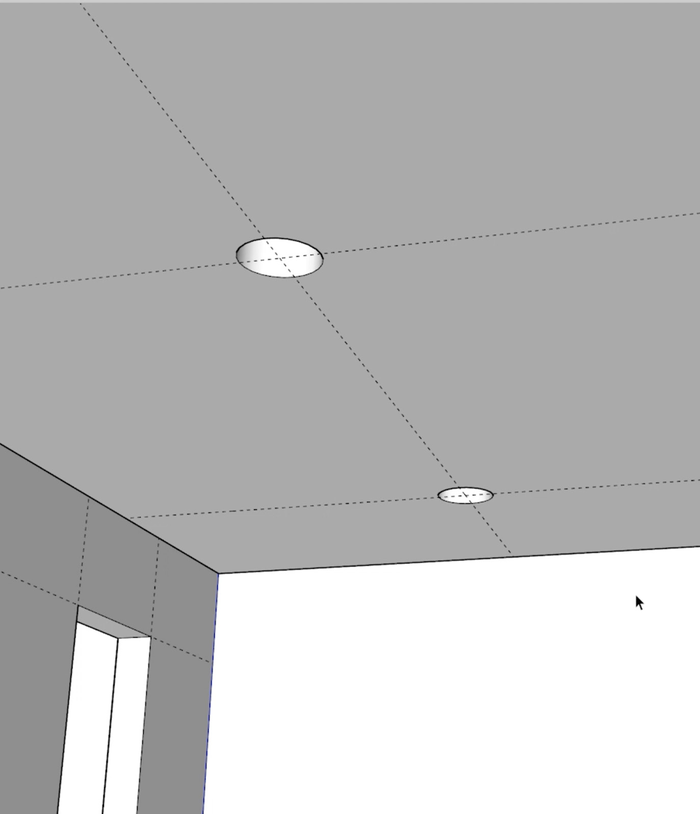
Create the Ceiling in much the same way as the Floors, just don’t forget to measure and account for the lights
The steps for drawing the ceiling are similar to the ones for drawing the floor. First, Orbit around to see the top of the walls. Then draw a rectangle covering the walls group. And Push-Pull the ceiling up to the proper dimension. And again, make the ceiling into a Group and assign a Tag to it.
But wait! When taking measurements of a room in the field, it’s easy to forget about the lights — especially when they’re recessed. But knowing where these are located can be important depending on the type of project you’re working on. In general, we recommend measuring to the center point of the light. Then, measure the diameter of the fixture. In SketchUp — you’ll need to enter Edit Group Mode to edit the geometry of the ceiling. Then follow the same process outlined so far to add new guidelines for the center point. And then use the Circle and Push Pull tools to create the opening for the lights.
#9 Add the Details
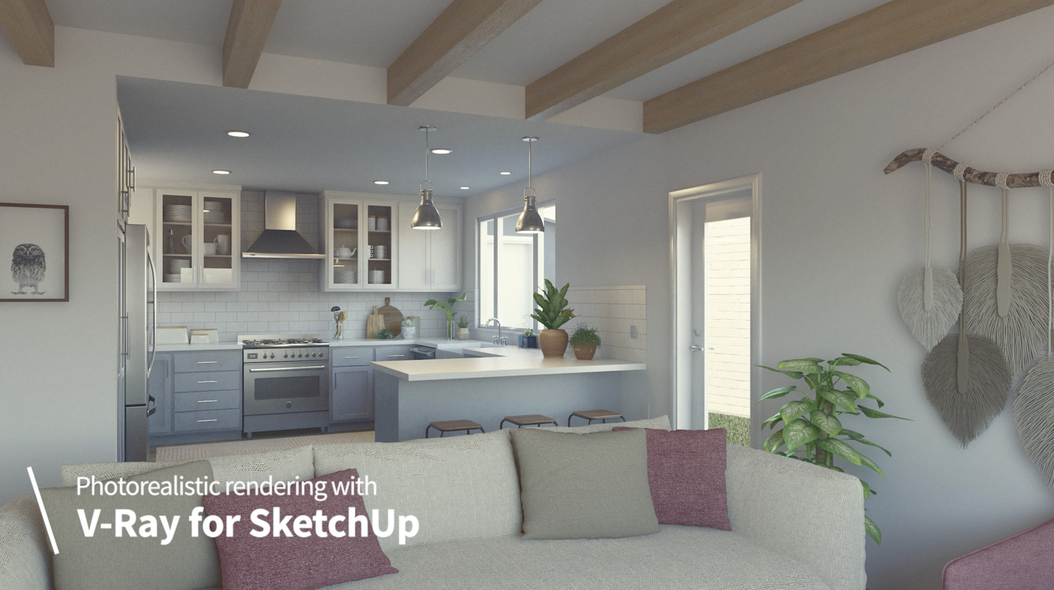
If it’s important to your project, don’t forget to measure and draw things like cabinets, electrical outlets, and more…
Most likely, if you’re measuring and modeling an existing space for a remodel project, this point is probably as far as you need to go in terms of recreating the existing conditions in SketchUp. And from here, you’re free to start building out any design changes, objects, fixtures, and materials as you see fit.
Or there may be more elements in the existing space that are important to your project that you’ll want to add to your SketchUp model. For instance, things like door and window casings, electrical outlet locations, pendant light fixture locations — or even objects in the room, like the existing cabinets and appliances. And in that case — you can simply follow the same steps we’ve outlined so far to measure and then draw or add those elements in SketchUp. How far and how detailed you want to take the model is really up to you!
YOUR NEXT STEPS
We hope our How to Measure & Model a Room video and these notes have gotten you started down the right path.
From here, it’s definitely possible to learn everything on your own. But if you don’t have the time to figure out what you need to know, and you can’t afford to pick up bad habits, we recommend checking out our Video Course Library.
It’s filled with $8700 worth of SketchUp training exclusively for professionals — including our Complete Intro to SketchUp and SketchUp for Interiors courses.