YouTube video notes for:
How to Turn 2D Floor Plans into 3D SketchUp Models (2024)

These are the full notes for our video — every tip, screenshot and step, right on this page.
Download these notes as a PDF#1 Import & Scale Your 2D Plan
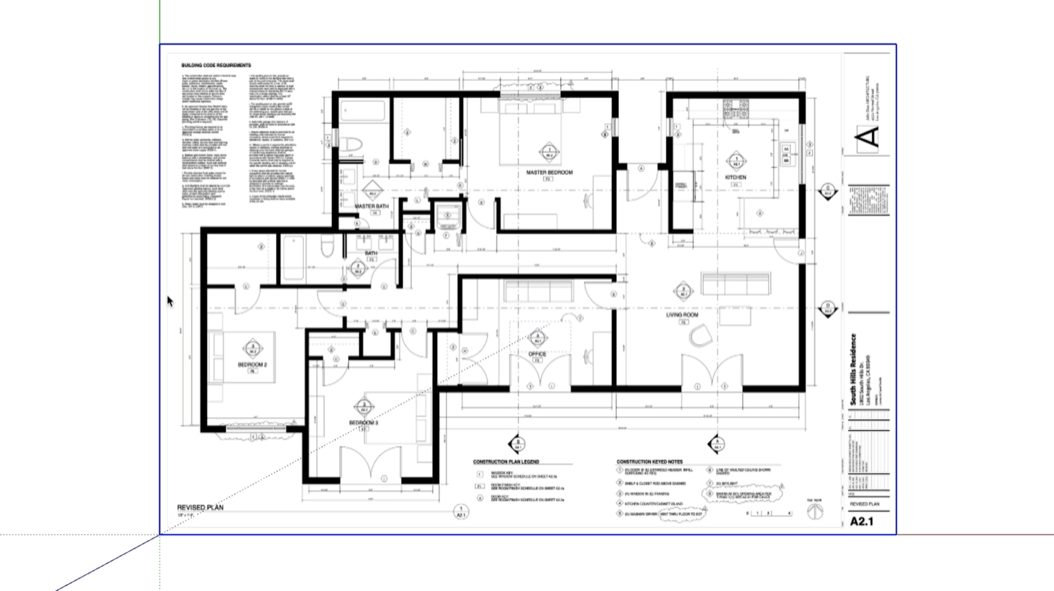
Import a 2D plan of anything — an object, room, building or site — as the basis for creating a 3D model in SketchUp.
When starting with a CAD file in a .dwg or .dxf format, you can import it into SketchUp and it will come into SketchUp at the correct scale. If you have a PDF or an image of a CAD file — or even a to-scale, hand-sketched floor plan — you can import that as well. But you’ll have one extra step to set the scale correctly: Once you’ve clicked to import your file, click once to set down the corner of the imported plan; Then move the mouse and click a second time to set the other corner.
To scale it properly, you’ll need to take a measurement of a known entity in the plan using the Tape Measure tool. Then, no matter what SketchUp says for the measurement, type in what the measurement should be and press Enter or Return on your keyboard; SketchUp will ask if you want to resize the model; Click Yes, and your imported plan will now be scaled correctly!
#2 Draw the Walls
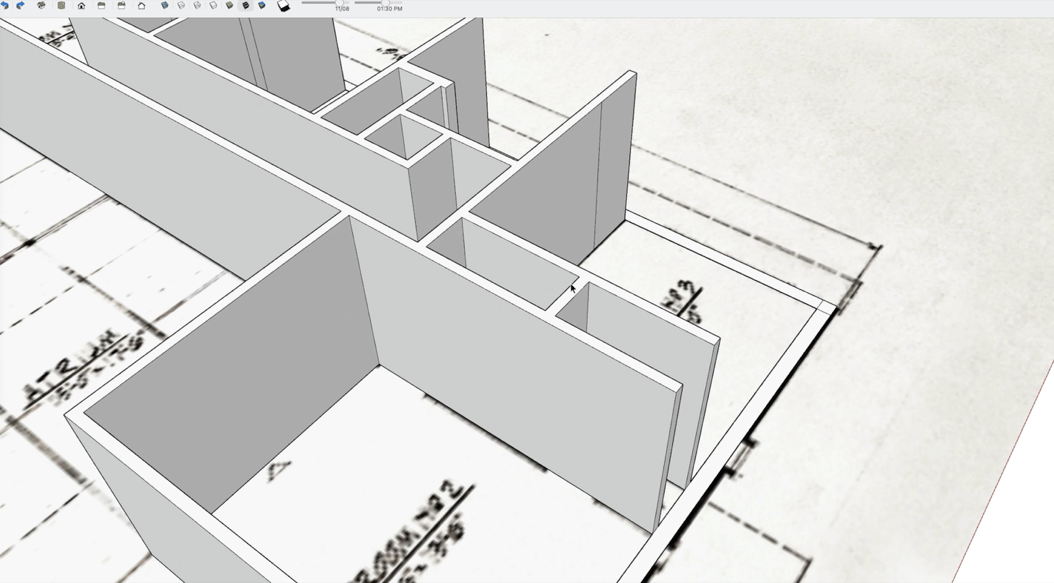
We recommend that you ignore your window and door openings during this step — you can address those later.
Before going further, make sure that your floor plan geometry has been made into a Group. If you imported a CAD plan, this should have happened automatically. Then, use SketchUp’s drawing tools to trace the wall segments on top of your imported Floor Plan group. The edges and faces you draw won’t stick to the underlying, grouped floor plan which means they can be edited separately.
With a CAD or SketchUp file as your base plan, SketchUp will automatically snap to the endpoints in your floor plan group. If you’re working from a PDF or image file, you have to manually ensure you’re accurate. As you trace over a wall segment, you just need to enter the dimensions for what the size should be and press enter. Your wall shapes will roughly match the image underneath, but you’ll know they’re perfectly accurate. Then, when you have your wall shapes, use the Push Pull tool to extrude them to the correct height.
#3 Add the Door Openings
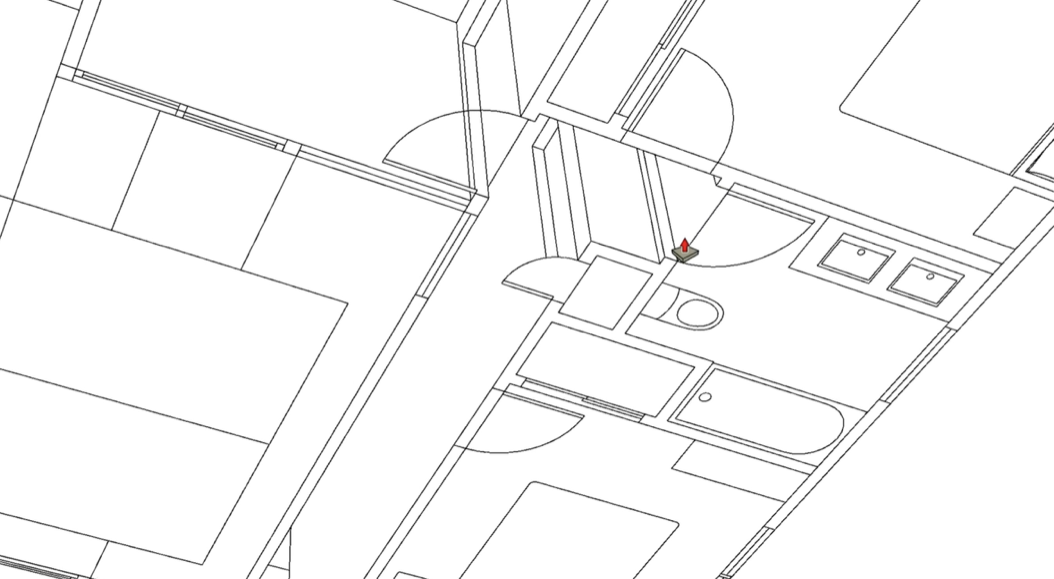
By waiting to add door openings until after your walls are drawn, you can create them much faster.
To create the door openings with a CAD or SketchUp file, navigate underneath and draw rectangles over all the door openings. Then use the Push Pull tool to begin creating the opening for your door — enter the correct height on your keyboard and press Enter or Return. If there are other door openings that are the same height, you can now double-click with the Push Pull tool on each one, and it will automatically match the same height!
If you’re using a PDF or image, you have one extra step: When you navigate underneath the floor plan you won’t be able to see through it; But you can turn on X-Ray view mode — and now you can see through the image and are able to trace the outlines for the door openings. Since SketchUp can’t infer and snap to points on your image, you’ll need to enter the dimensions to be sure everything is absolutely accurate. You can use the Tape Measure tool to set accurate guides before using the rectangle tool to draw the openings.
#4 Add the Window Openings
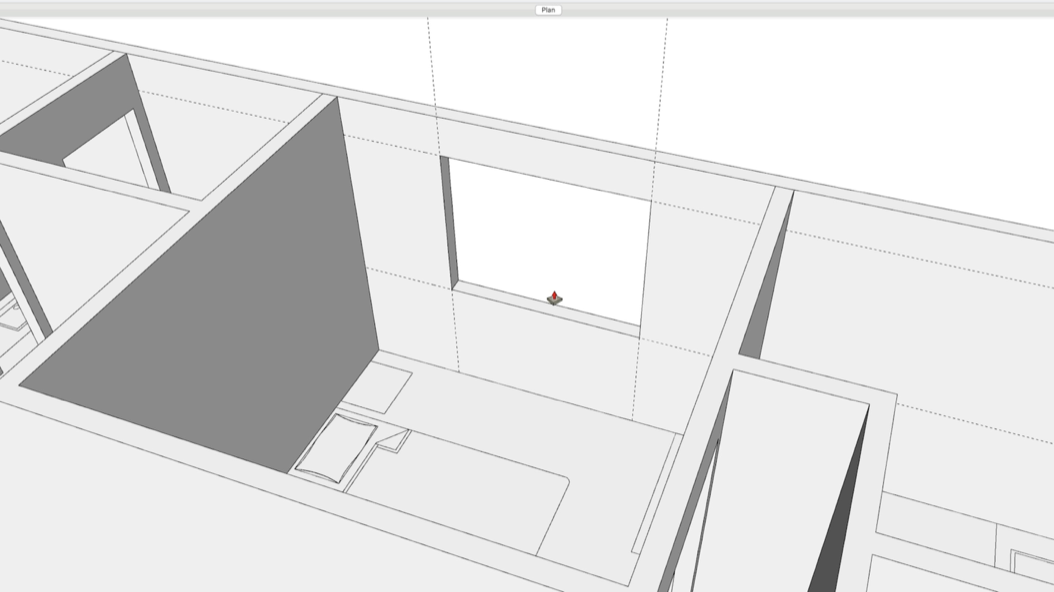
Similar to door openings, it’s much faster if you wait to create your window openings until after you’ve drawn your walls.
With a CAD plan, for the window widths, use the Tape Measure tool to pull a guide to each side of the window opening in the plan. For the heights, you’ll follow the same process to create horizontal guidelines, only you’ll need to know the dimension as you can’t reference anything in the plan. With an image of a floor plan, it’s the same process only you’ll need to know the distance between the edge you are pulling the guide from and the side of where the window opening will be.
Once you’ve set up guides for all your window openings, use the Rectangle Tool to trace a rectangle from one corner to another on each one. Then, you can use the Push-Pull tool to punch your openings through the walls. To do that, click once and push-pull into the wall until you get the On Face inference, or until you see the blue and white faces flickering; This lets you know that you are touching the other face which means that if you click again, the two faces will cancel each other out and punch out an opening.
#5 Group & Tag
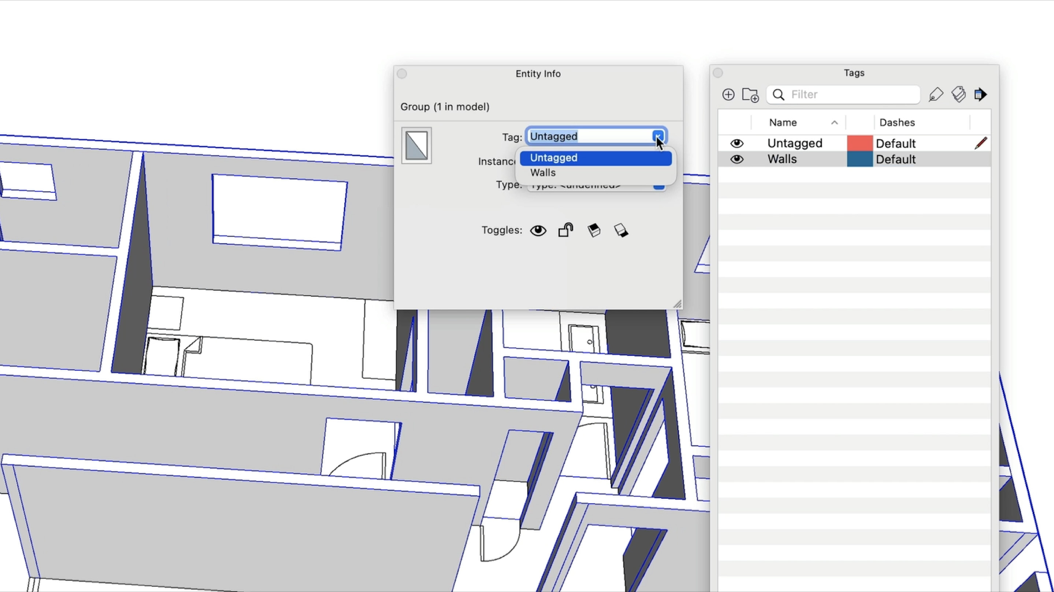
Group your walls to protect them from getting stuck to things, and assign a Tag to keep your model organized.
Once you’ve created your walls with all of the openings - be sure to make them into a Group. Then, to stay organized, it’s a good idea to create a Tag and then assign that Tag to the Group. You can create a Tag from the Tags window. Then right-click on your Walls Group and pick Entity Info; You’ll see a Tag dropdown where you can assign the correct Tag. If you’re using SketchUp Free, you create the Tag in the Tags panel on the right, then in the Entity Info panel, you click on the current tag and then assign the new tag.
Tags allow you to control the visibility of Groups and Components in your model which can be helpful while modeling since you can turn off things that are getting in the way, and later when it’s time to hide or show things when presenting your design ideas.
YOUR NEXT STEPS
We hope our How to Turn 2D Floor Plans into 3D Models video and these notes have gotten you started down the right path.
From here, it’s definitely possible to learn everything on your own. But if you don’t have the time to figure out what you need to know, and you can’t afford to pick up bad habits, we recommend checking out our Video Course Library.
It’s filled with $8700 worth of SketchUp training exclusively for professionals — including our courses covering the process of turning 2D drawings into 3D models.