
YouTube video notes for:
V-Ray for SketchUp — Getting Started (Updated for V-Ray 5 and SketchUp 2021)
These are the full notes for our video — every tip, screenshot and step, right on this page.
Download these notes as a PDF#1 Orient Your Model
V-Ray looks to SketchUp to tell it where the sun is, so there are a few things you have to get right in SketchUp first to ensure that the sun is shining in the direction you want when it comes time to render with V-Ray:
- Make sure your model is oriented properly relative to the solid Green Axis, which by default is pointing North.
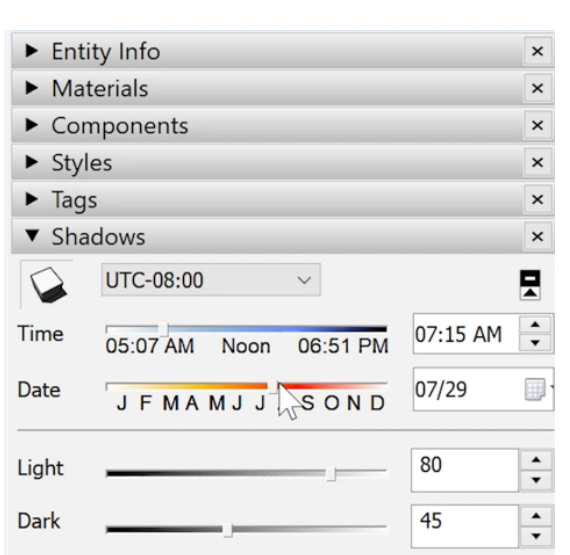
- In your Shadows dialog, pick the Time and Date (which will position the sun along the East/West or Red Axis).
To be even more accurate, be sure to use Add Location to geolocate your model. And try the Solar North extension to orient your model based on true north.
#2 Organize Your File
For faster render times in V-Ray, as well as for more quickly being able to make changes inbetween test renderings, follow these tips to better organize your SketchUp model:
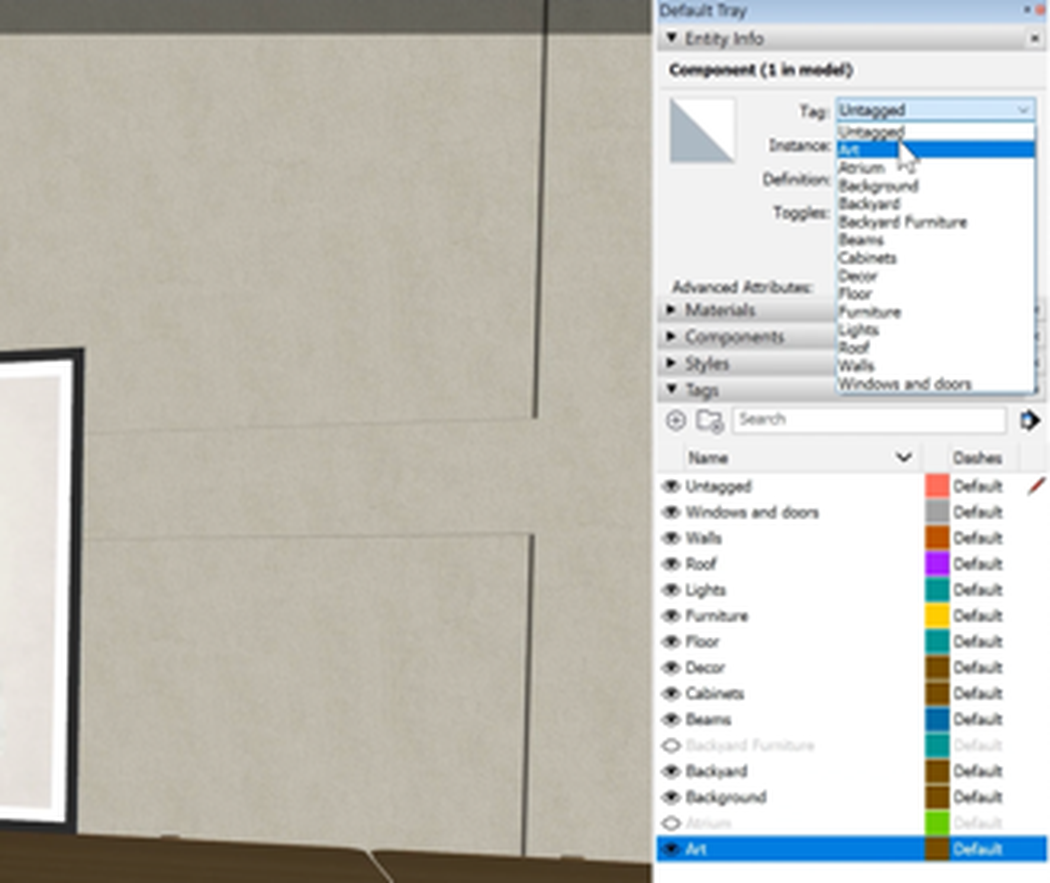
- As you create your 3D model in SketchUp, make Groups or Components of everything you draw.
- Assign Tags to those Groups and Components based on what you want to hide or show while either creating test renderings or exporting final renderings.
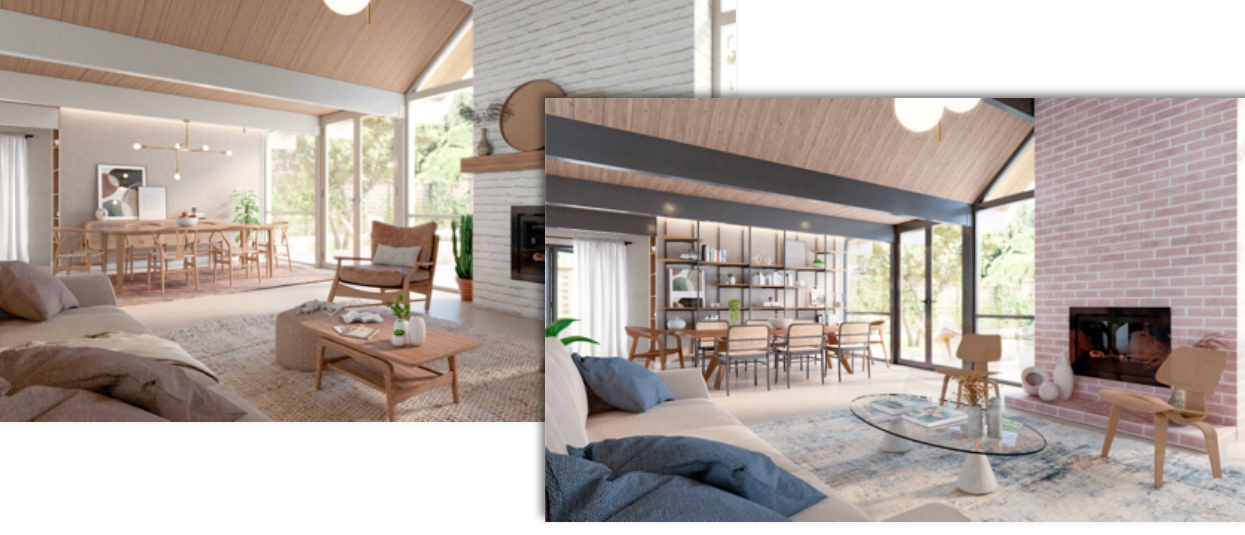
You can also use Tags to more easily create renderings showing different design options.
#3 Master Your Materials
All the materials you add and test out along the way in SketchUp, end up creating a long and often confusing list to work with later in V-Ray.
Some materials may no longer be ones that are used in the model. And many have names that aren’t very helpful. You can end up wasting a lot of time trying to find and change the materials you need to edit.
Here are a few things to keep in mind when working with materials:
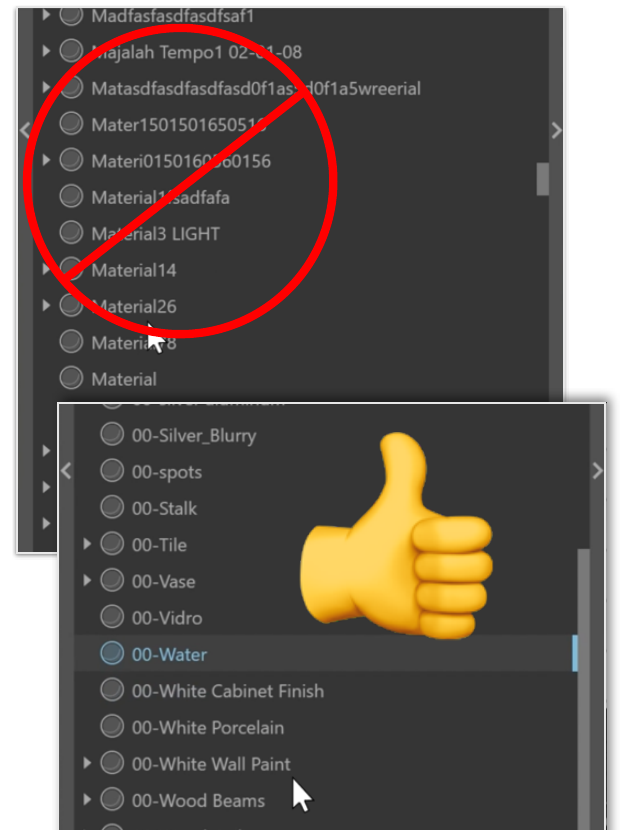
- Name every color or material that you add to your model. It’s much easier to edit all of your materials later in V-Ray when you’re scrolling through a list of specific names rather than generic ones
- Use as few materials as you can in SketchUp so that you have fewer to edit later in V-Ray. For example, you can use one material for all the shiny metal surfaces even if they are all slightly different materials in the real world.
- Be sure to Purge Unused to get rid of materials you’re no longer using. To do that, in your top menu select Window > Model Info and then pick Statistics to find the Purge Unused button.
#4 Add Important Details
In real-life, the world is full of beveled edges, reliefs and other design details. To get a realistic rendering out of V-Ray, your SketchUp model needs to have the same attention to detail. Here are 3 specific things to look out for:
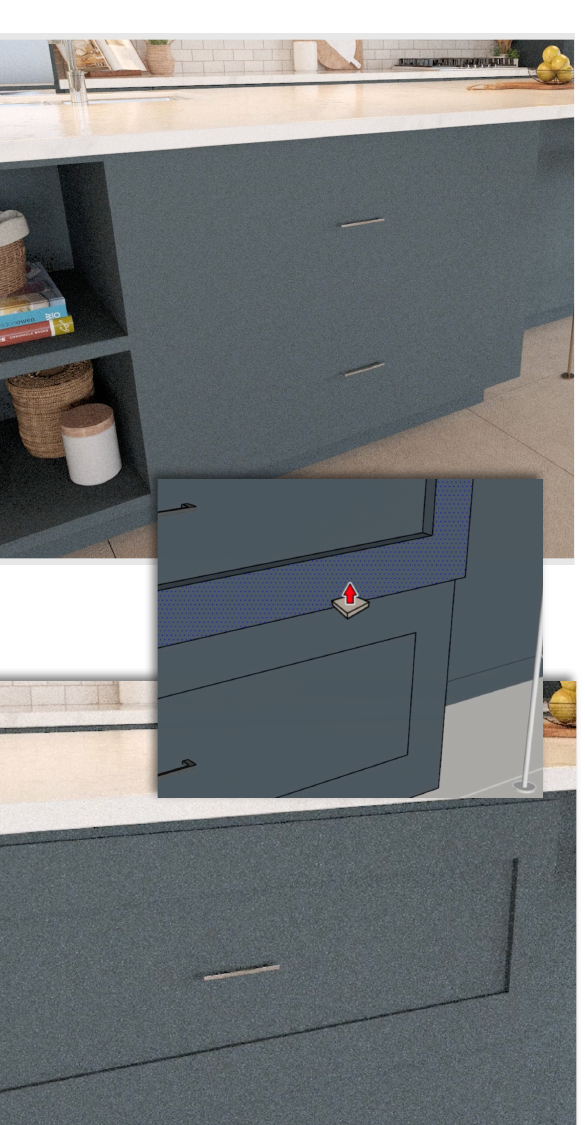
- V-Ray renders faces, not edges. So you need to model your faces with 3-dimensional depth if you want your renderings to look realistic.
- In the real world, there are often small gaps and reliefs between surfaces. In SketchUp you have to account for those small details and make sure not have things touch perfectly.
- In SketchUp it’s easy to create everything with sharp corners and edges. But in the real world, things are often beveled or rounded. To add those types of realistic details in SketchUp you can use the Follow Me tool, or you can add an extension like FredoCorner.
#5 Mind Your Polygons
In SketchUp, you must pay attention to how many Faces or “Polygons” make up your 3D model as it will affect both the speed and quality of the renderings you get using V-Ray for SketchUp.
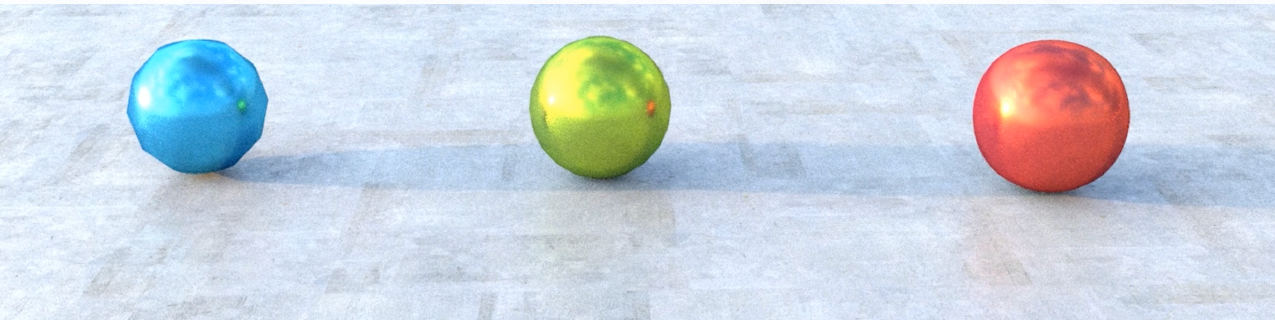
Less polygons means faster render times. However, it can also mean lower quality - for example, lower-poly models can look faceted and less realistic. On the other end of the spectrum, more polygons gives you higher quality, but at the expense of longer render times. What’s worse is your SketchUp model also slows down when you have too many polygons in it, which can be a problem when you’re trying to edit it.
The goal then is to find the middle ground - a polygon count that gives you the quality you want without needlessly slowing down your rendering. Here are some tips to achieve that goal:
- The further from the camera an object will be in your final rendering, the lower polygon count it can have while still looking good. Save your higher polygon objects only for the stuff where you’ll really be able to see the difference.
- Make Components of any objects you’ll use more than once - Components are rendered more efficiently by V-Ray.
- Use V-Ray’s Proxy feature to turn a high-polygon component into a lower polygon proxy in SketchUp that will still render full detail in V-Ray.
- Try using the Skimp extension to reduce the polygon count while retaining the visual quality of higher polygon objects you download from the 3D Warehouse.
BONUS Use High Quality Models
If you’ve done everything we’ve outlined so far, then your model will be set up for success when you get to rendering in V-Ray! However — One thing that can hamper the realism of your final rendering is making the mistake of using lower quality 3D models for the objects you add to your scene. By low quality, we mean objects that haven’t been modeled with a realistic attention to detail, OR objects that have low resolution, unrealistic or inaccurately applied materials.
Here are some tips for finding high-quality models:
- In V-Ray 5 you have access to Cosmos: A curated 3D library of high-quality, render ready models of things like Furniture, Trees, Cars, People and more.
- The 3D Warehouse is a good option for high-quality models as well. Just remember to look for curated collections as a quick way to filter down to the good stuff.
- Some SketchUp Extensions come pre-bundled with libraries of high-quality models. Two of our favorites: Laubwerk and 3D Bazaar.
- You can also find high-quality 3D models via 3rd party websites that can be imported into SketchUp. Some models are SketchUp files, and others are in other 3D file formats that can be imported using an extension like Transmutr.
Here’s a list of our favorite sites:
YOUR NEXT STEPS
We hope our V-Ray for SketchUp — Getting Started video and this render-ready checklist have gotten you started down the right path.
From here, it’s definitely possible to learn everything on your own. But if you don’t have the time to figure out what you need to know, and you can’t afford to pick up bad habits, we recommend checking out our Video Course Library.
It’s filled with $8700 worth of SketchUp training exclusively for professionals — including our V-Ray for SketchUp courses.