YouTube video notes for:
LayOut Checklist: 7 Things to Get Right in SketchUp
These are the full notes for our video — every tip, screenshot and step, right on this page.
Download these notes as a PDF#1 Create Scenes Before Viewports
In LayOut, you set-up views of your SketchUp model called Viewports.
But before you do that, you must first create a Scene in SketchUp.
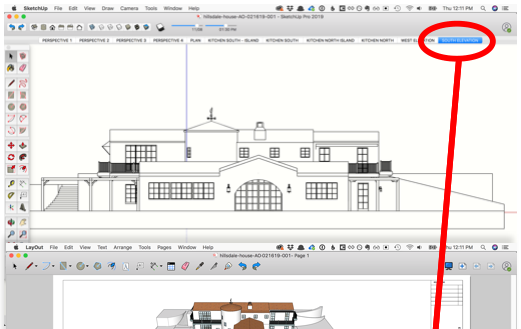
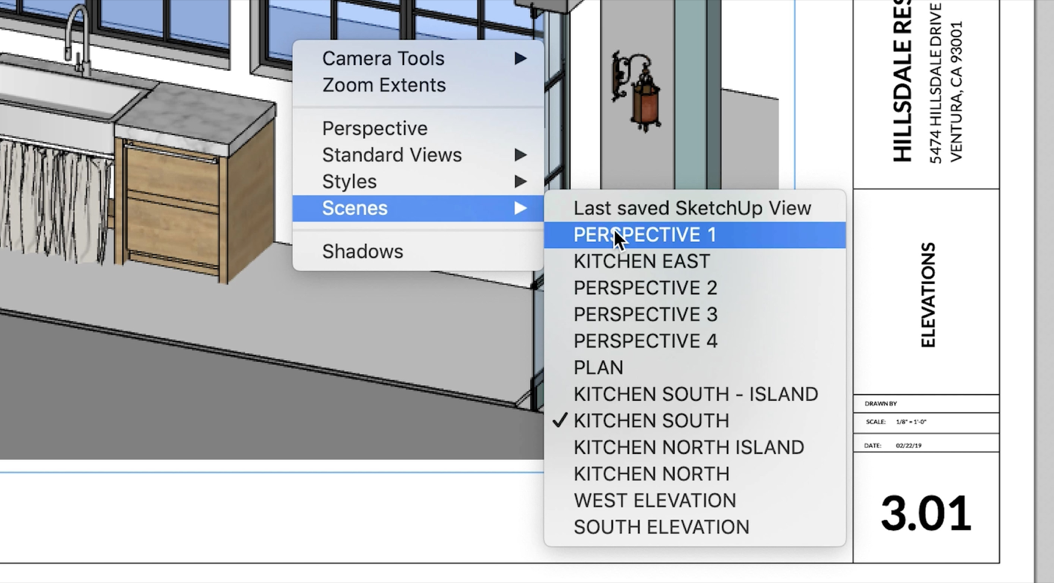
Later in LayOut, you link your Viewport to the SketchUp Scene you created.
#2 Get the Right Camera Views
To set-up more traditional plan or elevation style drawings in LayOut, you need to master your Camera in SketchUp.
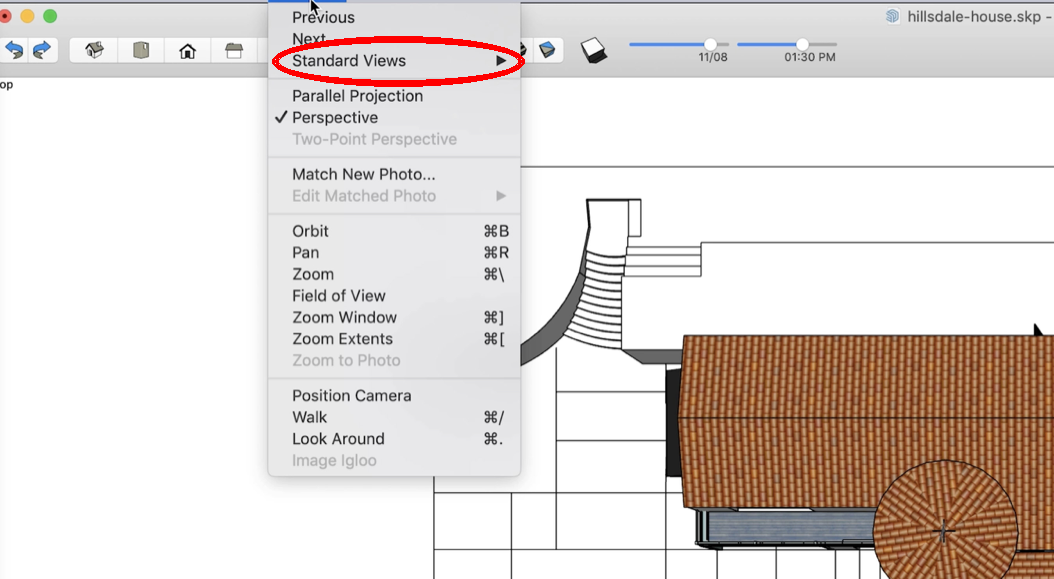
For standard views (e.g., Plan view), in SketchUp, go to your top menu and select Camera > Standard Views > and pick the view you want.
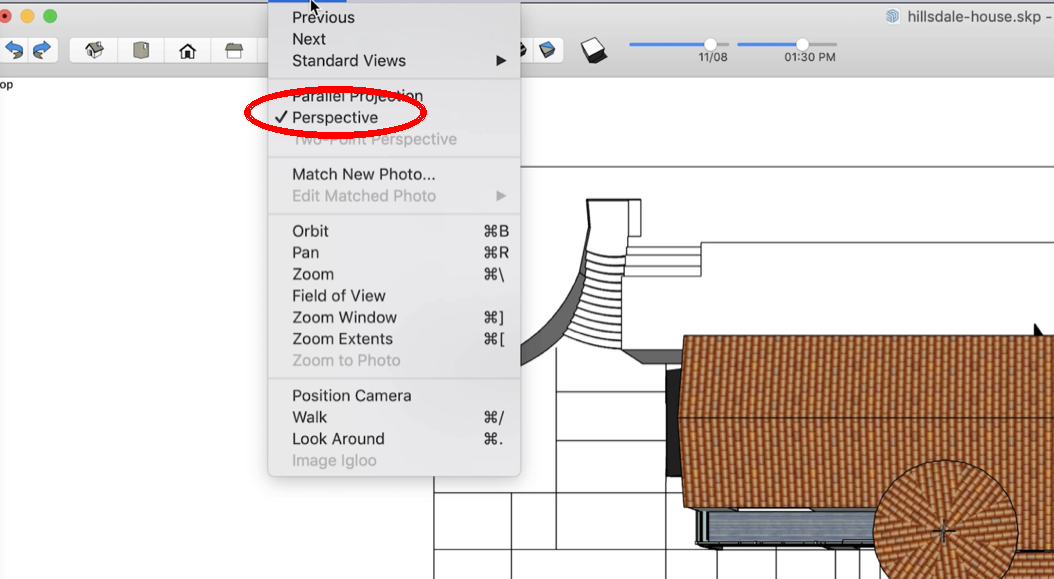
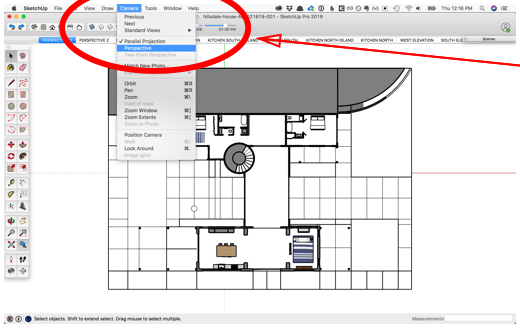
For 2D views be sure to toggle your camera Perspective on/off by going to your top menu and selecting Camera > Perspective (each time you repeat this step, you will toggle whether it is on or off).
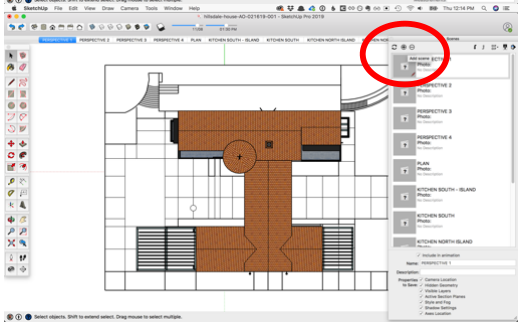
Be sure to save or update a Scene once you have the right camera view.
#3 Give each Active Section Cut its own Scene
When you use the Section Plane tool, it will place a Section Plane into your SketchUp model and that plane will create a Section Cut. That Section Cut is considered the Active Cut - meaning that it is actively cutting the model.
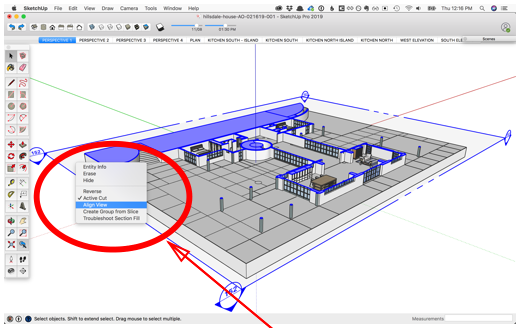
As a best practice, for every section cut you add to the model, you should save a Scene specifically to display that section cut. The steps are:
- Add a Section Plane (it will become the Active Cut)
- Right-click on the plane and pick the option for Align View
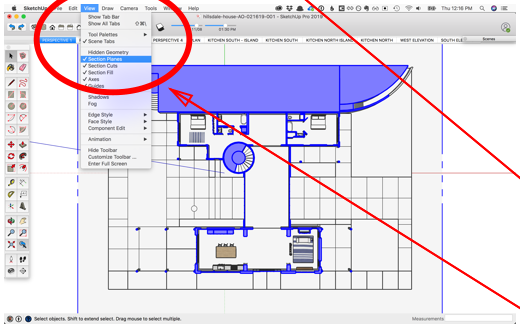
- To hide the plane, in your top menu select View > Section Planes
- Remember to turn off Perspective if needed
- Then Pan and/or Zoom to center the Section Cut
- In your Scenes window, click the “+” icon to create a new scene with the view of your Section Cut saved
#4 Use Layers the Right Way
For each Scene, you can use Layers to make sure you’re showing the right stuff and hiding the rest. Here are some rules for using Layers the right way:
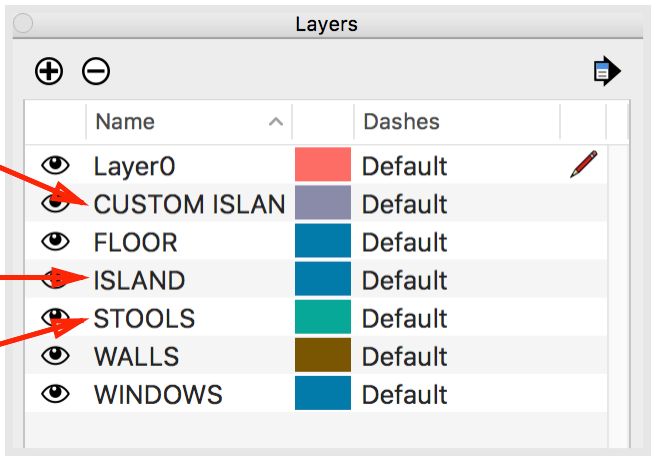
- Leave Layer0 as the Active Layer
- Assign only Groups and Components to Layers (never assign loose edges and faces to Layers)
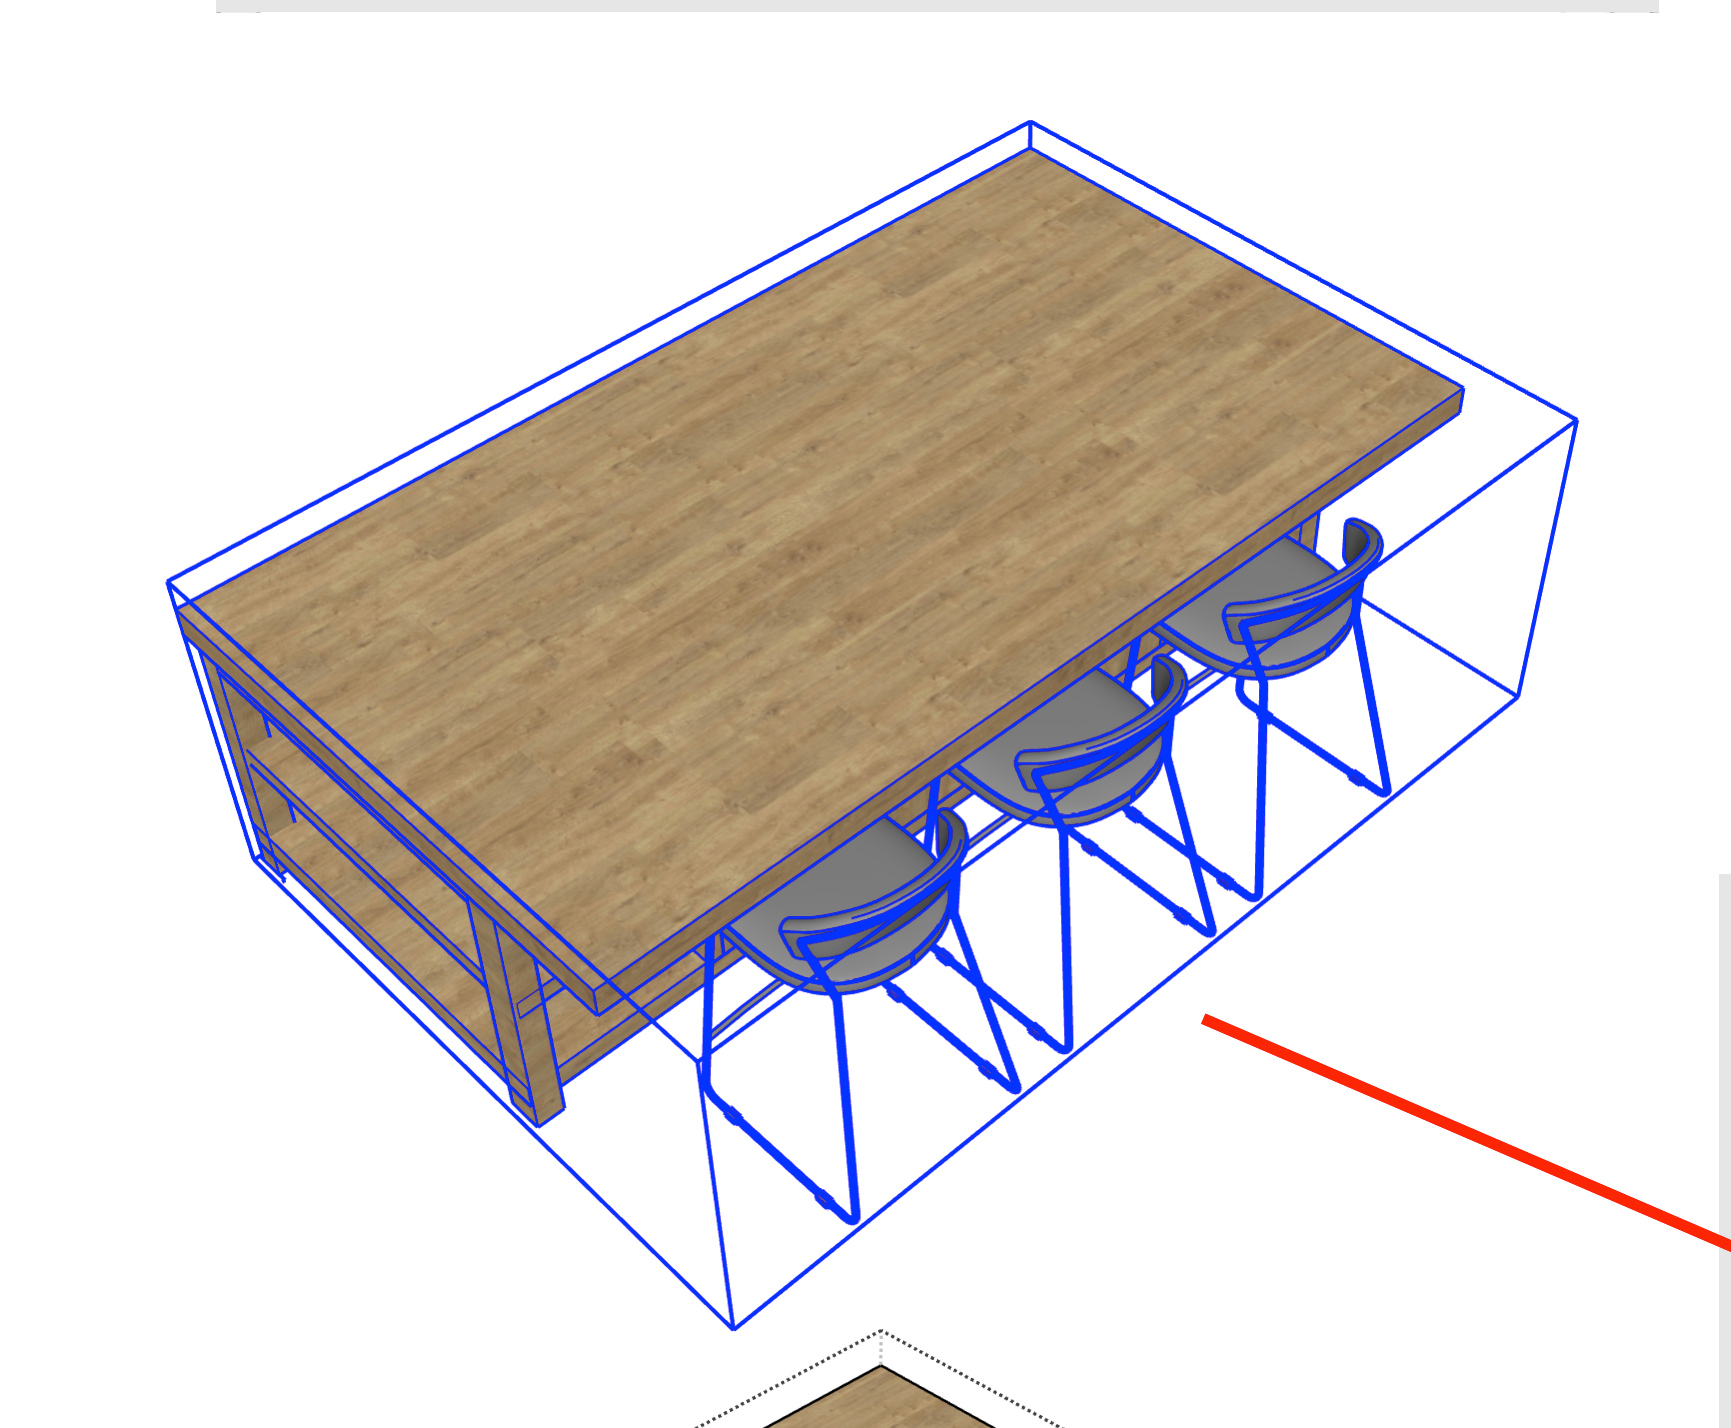
- Take advantage of Nested Groups and Components where you can assign a Parent level Group or Component to one Layer while assigning a Child level Group or Component to another Layer
#5 Control Line Weights via Styles
To control line weights in LayOut, follow these steps:
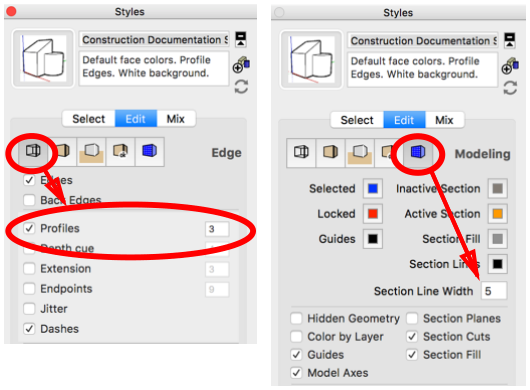
- In SketchUp, in your Styles window, for your Edge settings decide whether your Profile edges should have a different line weight (if Yes, turn them on, if No then turn them off).
- Also in SketchUp, in your Styles window, under your SketchUp Model settings, set how many times thicker than your Edges you want your Section Cut lines to be.
- Save or update a Scene with these Styles settings
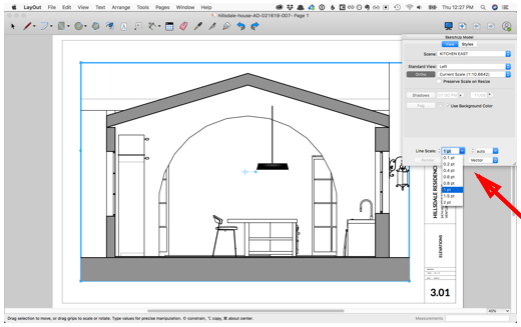
- In LayOut, in your SketchUp Model dialog you can set your Line Scale for a selected Viewport
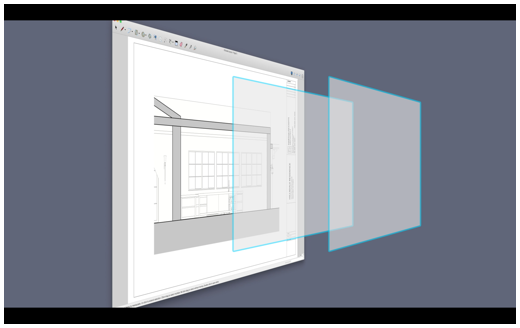
- If you need more than the 3 line weights you get in a single Viewport, stack multiple viewports on top of one another (each with different line weights and/or other styles and settings)
#6 Name your Groups and Components
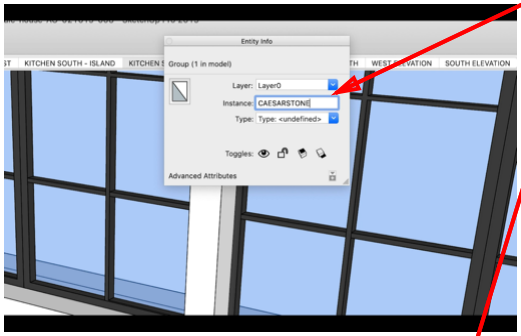
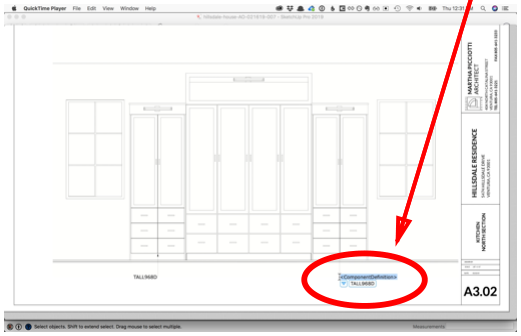
If you name your Groups and Components in SketchUp first, LayOut can automatically fill those names in when you’re using the Label tool (as well as the AutoText feature).
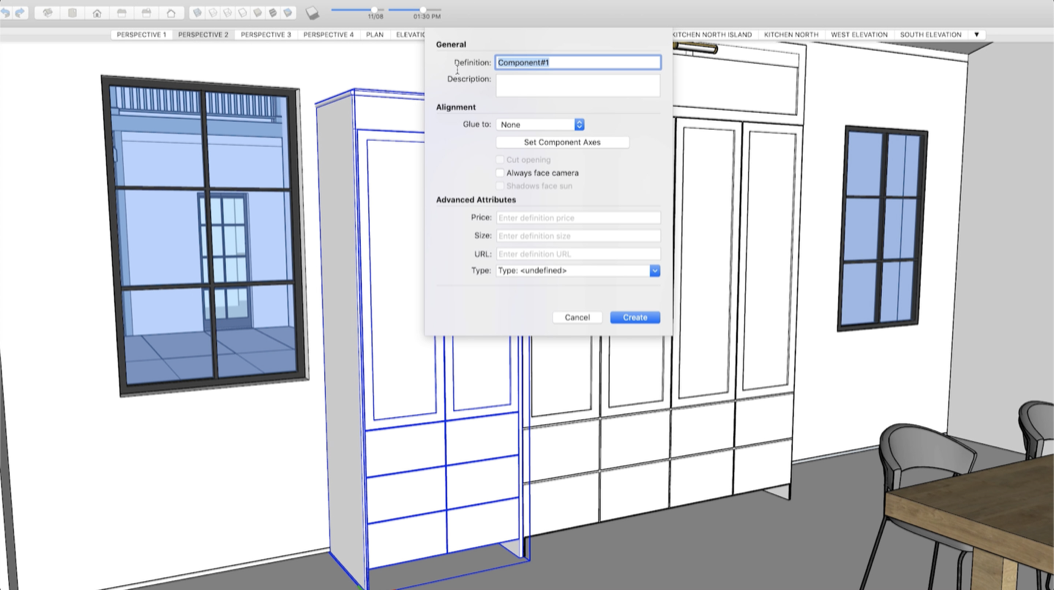
For Components, you name them when you create them.
For Groups, you can name them in the Entity Info window.
Then when you use the Label tool in LayOut, rather than typing the names you can accept the Component or Group Definition.
#7 Draw some 2D symbols in SketchUp
For 2D symbols that are a part of the design, it’s better to draw them in SketchUp. That way any design changes you make in SketchUp will automatically update the position of the 2D symbol in your LayOut Viewport later.
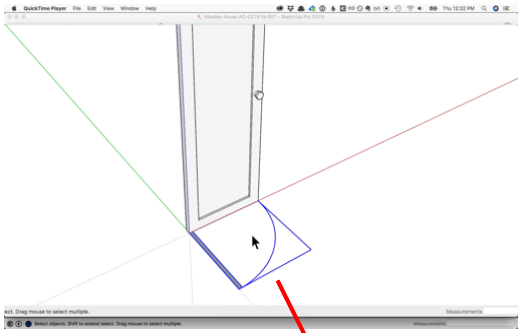
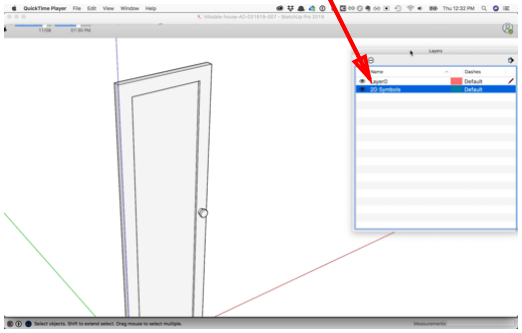
Just be sure to put 2D symbols into their own Groups and onto their own Layers so that you can turn them on and off as needed.
YOUR NEXT STEPS
We hope our Watch This Before You Get Started with LayOut for SketchUp Pro video and this checklist have gotten you started down the right path.
From here, it’s definitely possible to learn everything on your own. But if you don’t have the time to figure out what you need to know, and you can’t afford to pick up bad habits, we recommend checking out our Video Course Library.
It’s filled with $8700 worth of SketchUp training exclusively for professionals — including our LayOut course.